Connect Sources
To connect a source to Elastio Tenant means to deploy Elastio to your AWS account. In order to deploy Elastio navigate either to the On Boarding or to the Sources page and press the “Link Source” button. Alternatively, you can set up your Tenant and after that you will be forwarded directly to the Cloud Installer flow. The flow will guide you through deploying the Elastio CloudFormation stack and Cloud Connector and allow you to connect sources to your dedicated space.
- Enter your AWS account number into the input field in Step 1.

Figure 1: Enter your AWS account ID
- Select an AWS region to deploy the Elastio CloudFormation stack to. Click on the “Deploy CloudFormation Stack” link.
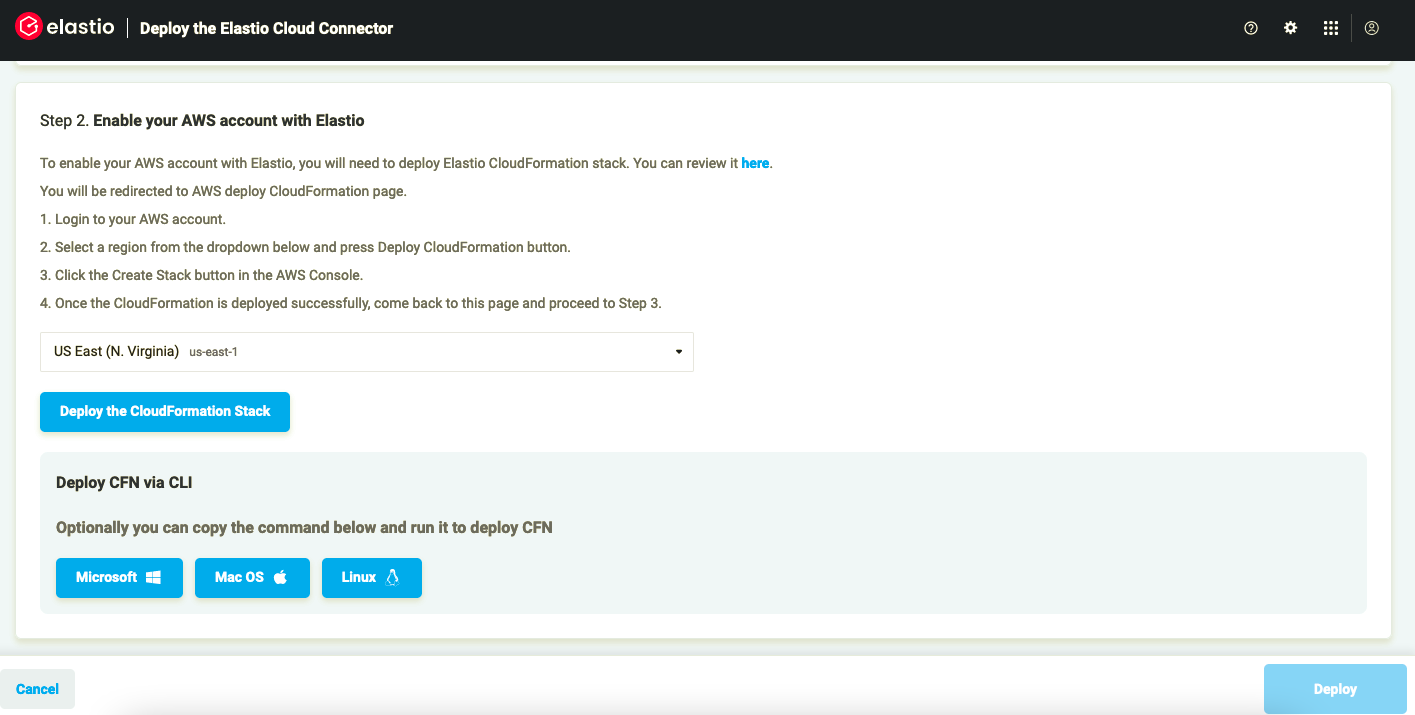
Figure 2: Deploy CloudFormation stack
-
An AWS Console window will open in a new tab.
-
On Step 2 you have an option to add custom prefix and/or suffix to the IAM roles and permissions that the Elastio CloudFormation tack will deploy.
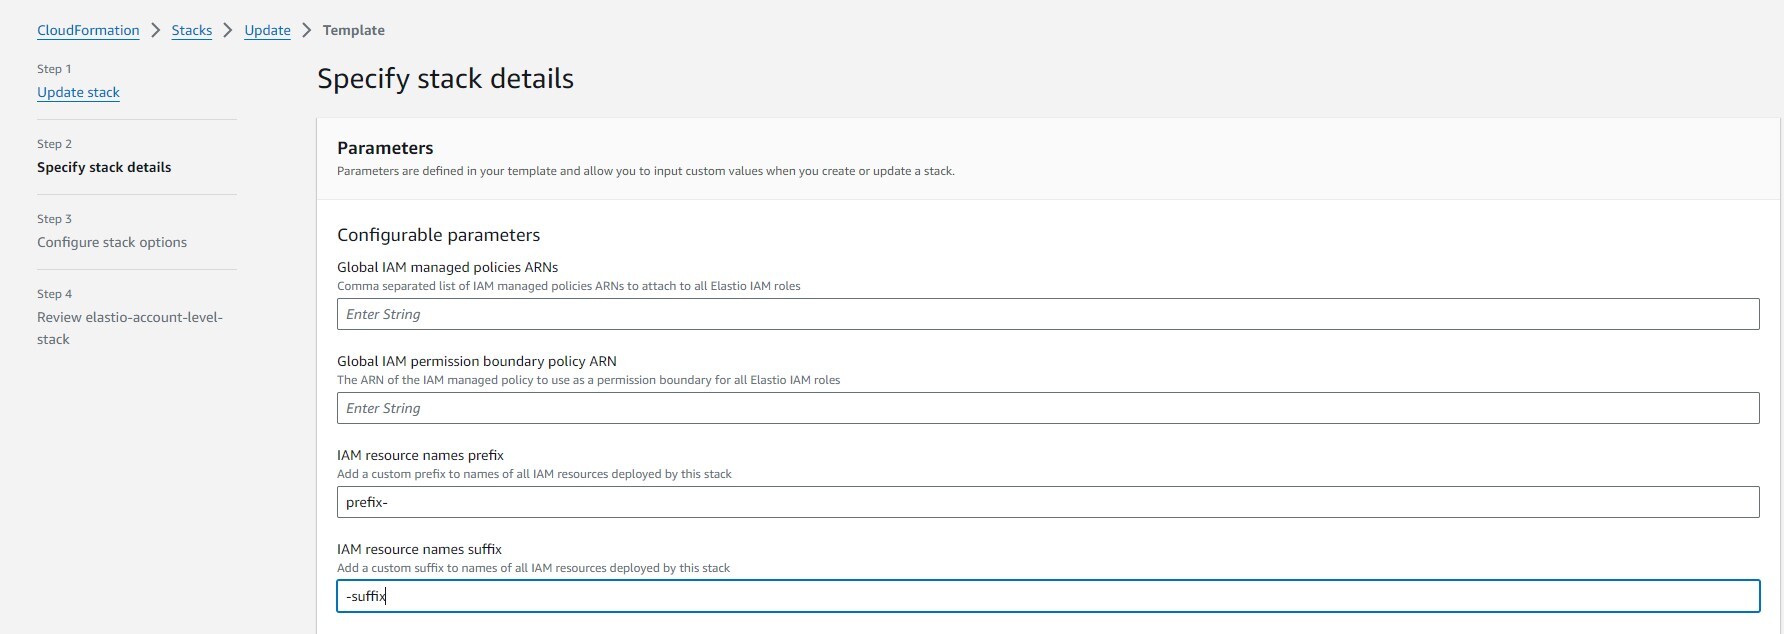
Figure 3.1: Add custom suffix and/or prefix
Please note that the combined length of the suffix and prefix together should not exceed 14, or else some of the role names will exceed the Amazon limit for role name length. In the case it does exceed the specified amount, the CloudFormation deployment will fail with the following error:
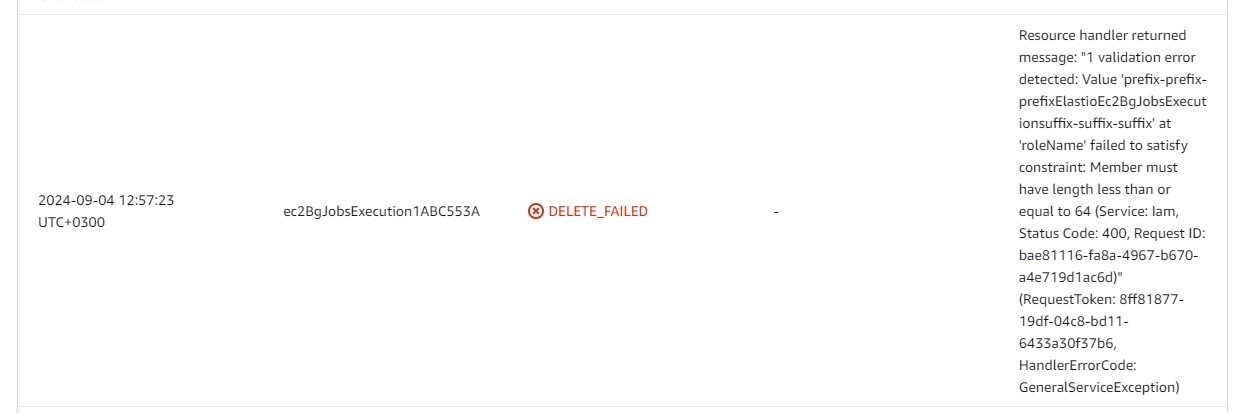
Figure 3.2: Prefix + suffix too long error
When the CloudFormation stack is deployed successfully, the IAM roles and policies that it created will have the specified prefix and/or suffix.
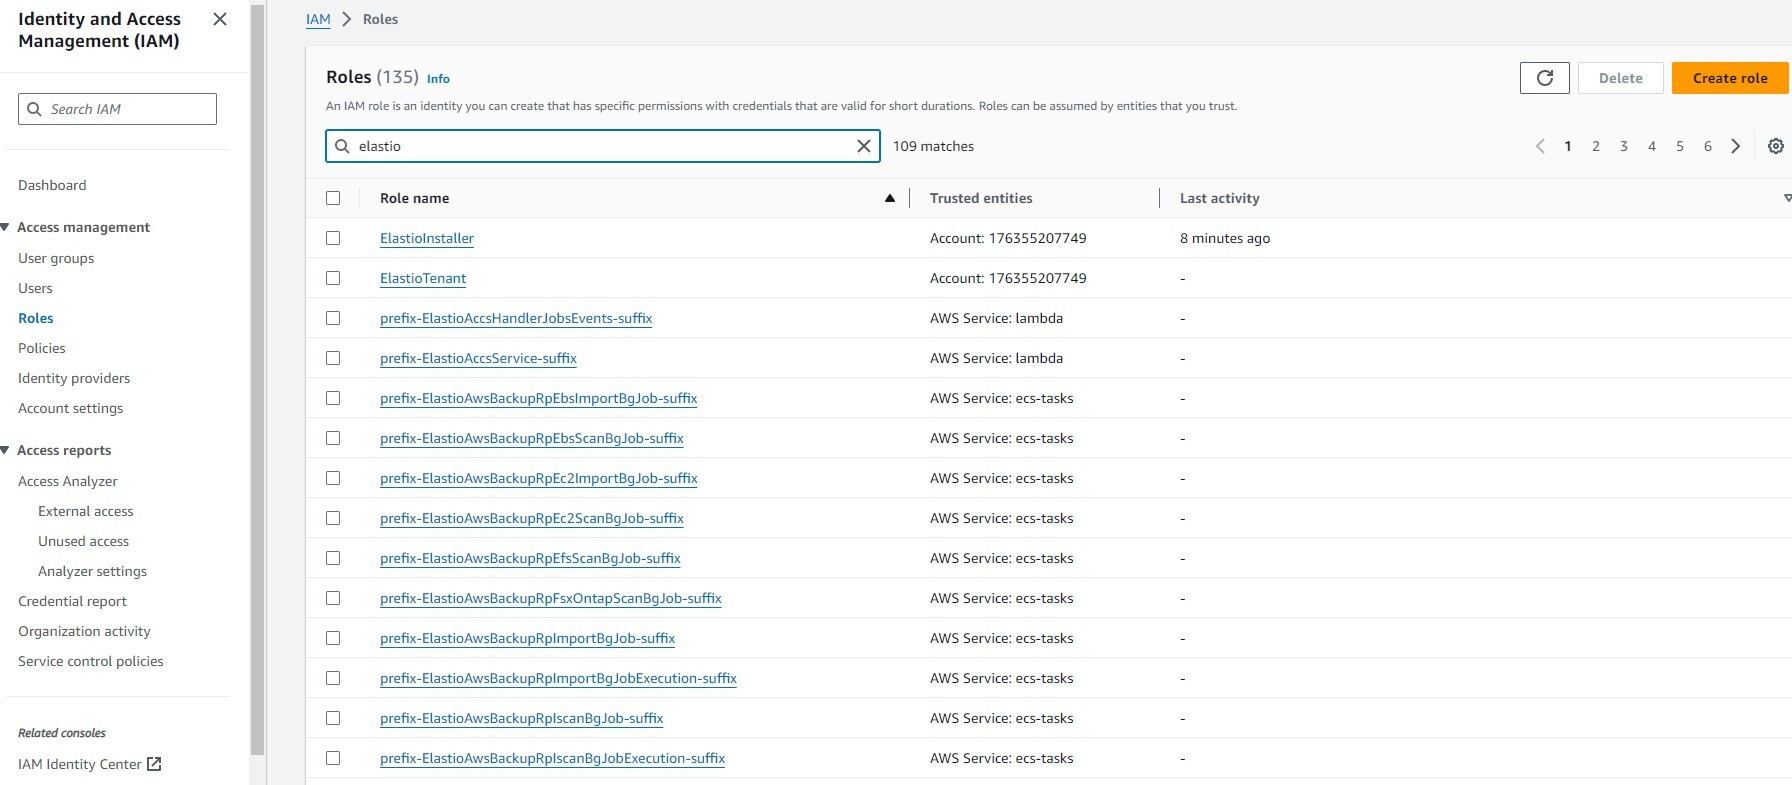
Figure 3.3: Resources with prefix and suffix
- Check the checkbox “I acknowledge that AWS CloudFormation might create IAM resources with custom names.”

Figure 4: Acknowledgement window
- Click the “Create Stack” button. Wait until the CloudFormation stack is deployed successfully. This might take a couple of minutes.
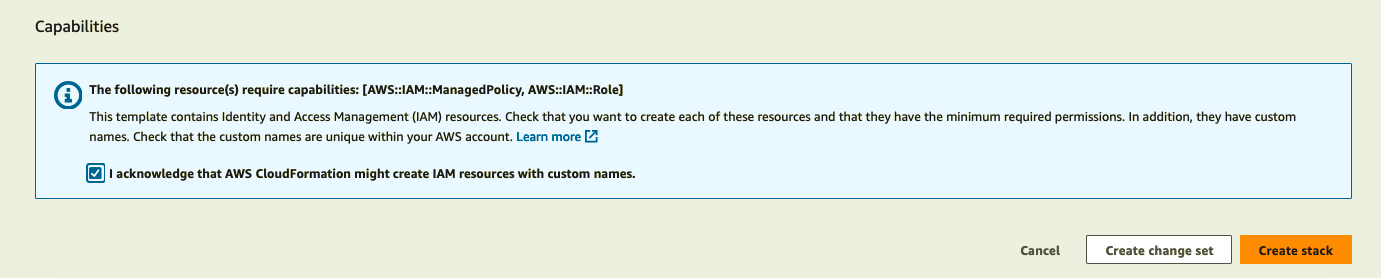
Figure 5: Create stack
Note: For further details on the Cloud Connector security information, click here.
- Once the stack creation is completed, go back to the Elastio Cloud Tenant. A list of available regions should appear in Step 3. Select the region(s), the VPC(s) and subnets you want to deploy to. A default VPC is pre-selected, but you can change it if you wish. The subnets selection is also important. Due to variable spot availability across availability zones it is recommended to select multiple subnets in several availability zones for each vault, if possible.
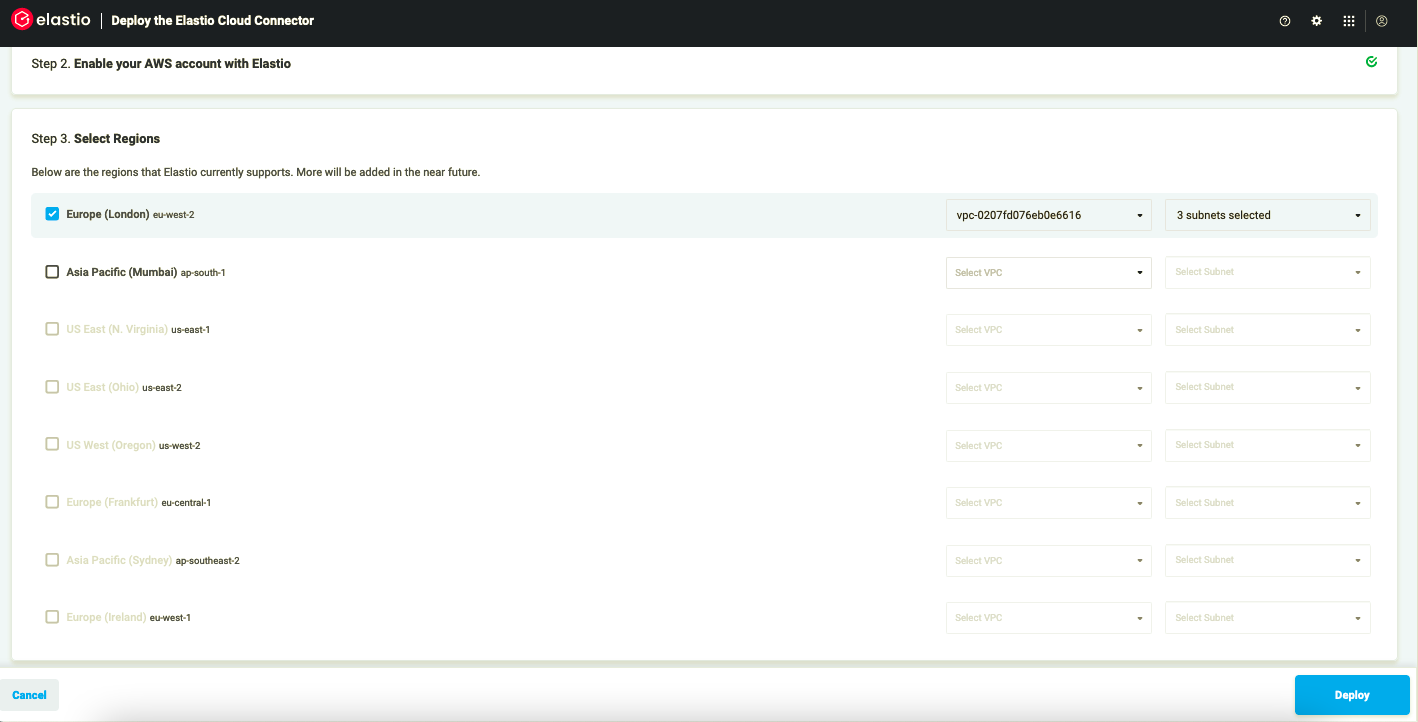
Figure 6: Select regions
Note: The selected VPC can have either a public, or a private subnet, as well as a subnet in every Availability Zone within the region. Public subnets with an IGW require “auto-assign public IPv4 address” and allow Elastio to run smoothly. Though if you plan to use Elastio only within the VPC with a private subnet, you will need to create a private subnet with a NAT gateway. The instructions below will help you to configure it:
- Create a public NAT in the public subnet.
- Go to the private subnet route table and route
0.0.0.0/0through the NAT. - The public subnet route table should have a route
0.0.0.0/0to IGW interface.
In this case the vault will only be accessed from within the private subnets. Performing backups and mounts from systems outside of the subnets will be possible only after setting up a VPN tunnel into the VPC with a network path from the VPN tunnel to the private subnets, where the vault is running.
Deploying the vault entirely in public subnets will allow the vault to be accessible over the Internet. So, performing backups, restores and mounts from outside of AWS (either from other clouds or from on-prem workstations) will become available. This is the most flexible configuration, but it might not be permitted depending upon each organization’s security policies.
- Click the “Deploy” button.
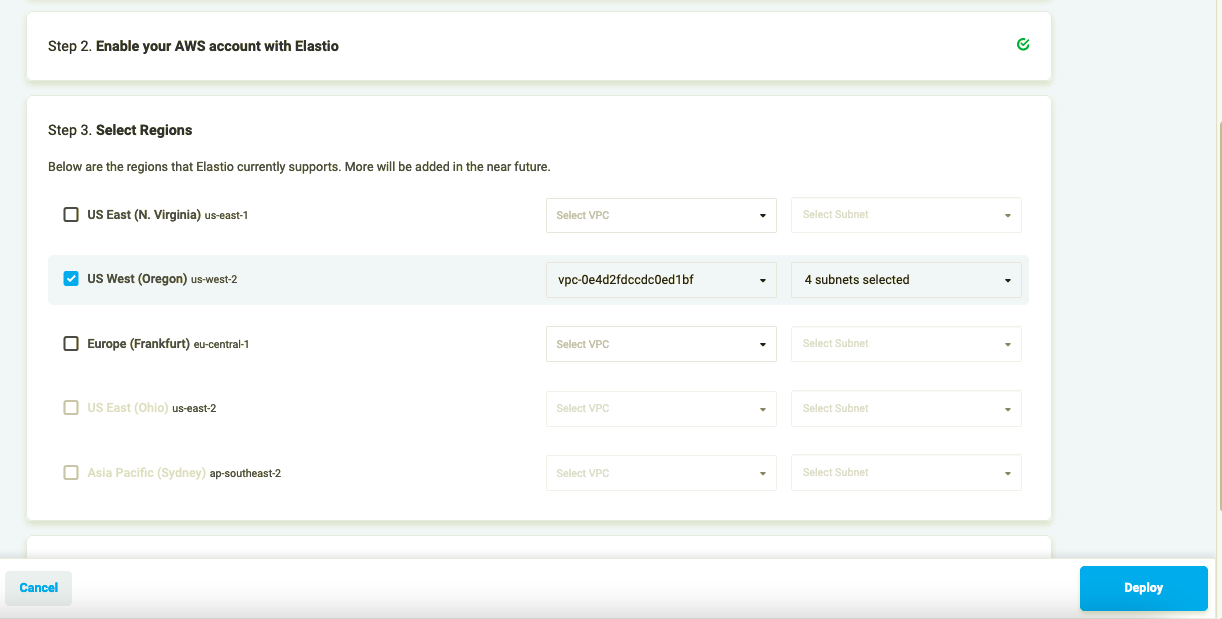
Figure 7: Deploy Elastio
- You will be forwarded to the Jobs page, where you can monitor the progress.
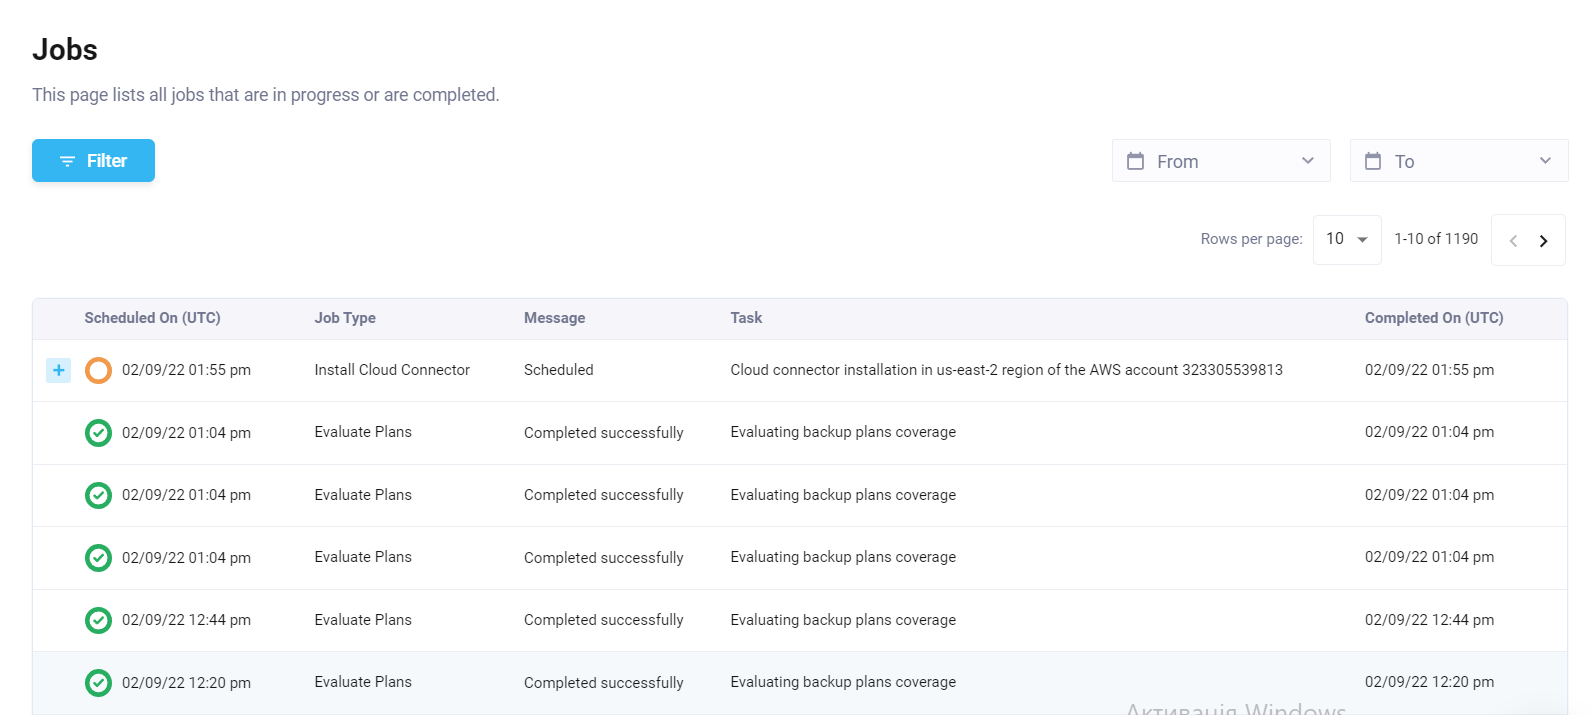
Figure 8: Jobs page
Note: A default vault will be created for you when deploying the Cloud Connector to your account. You will be able to create additional vaults through the CLI or using your Elastio Tenant later.
Once you have deployed Elastio to your AWS account, you can go on and create your first protection policy.
Alternatively, you can install the Elastio CLI and back up your assets with it.