Continuously Protect EC2 Instances
Table of Contents
- Set Up Elastio
- Create a Policy
- Monitor Backup Progress
- Audit Recovery Points
- Restore a Recovery Point
- Explore reports
Data protection in the cloud has become simple with Elastio. Elastio provides the safety of EC2 instances backups that you can easily automate and the security of robust ransomware and malware detection for all of your cloud assets.
In this tutorial you will learn how to enable continuous protection and accelerate ransomware recoveries of AWS EC2 instances.
Set Up Elastio
Once you have connected to your Elastio Tenant and logged in, you will be forwarded directly to the Cloud Installer flow that will guide you through deploying Elastio to your AWS account. Alternatively, this Cloud Installer flow can be reached through the Sources page under the “Link Source” drop-down menu.
- Enter your AWS account number into the input field in Step 1.
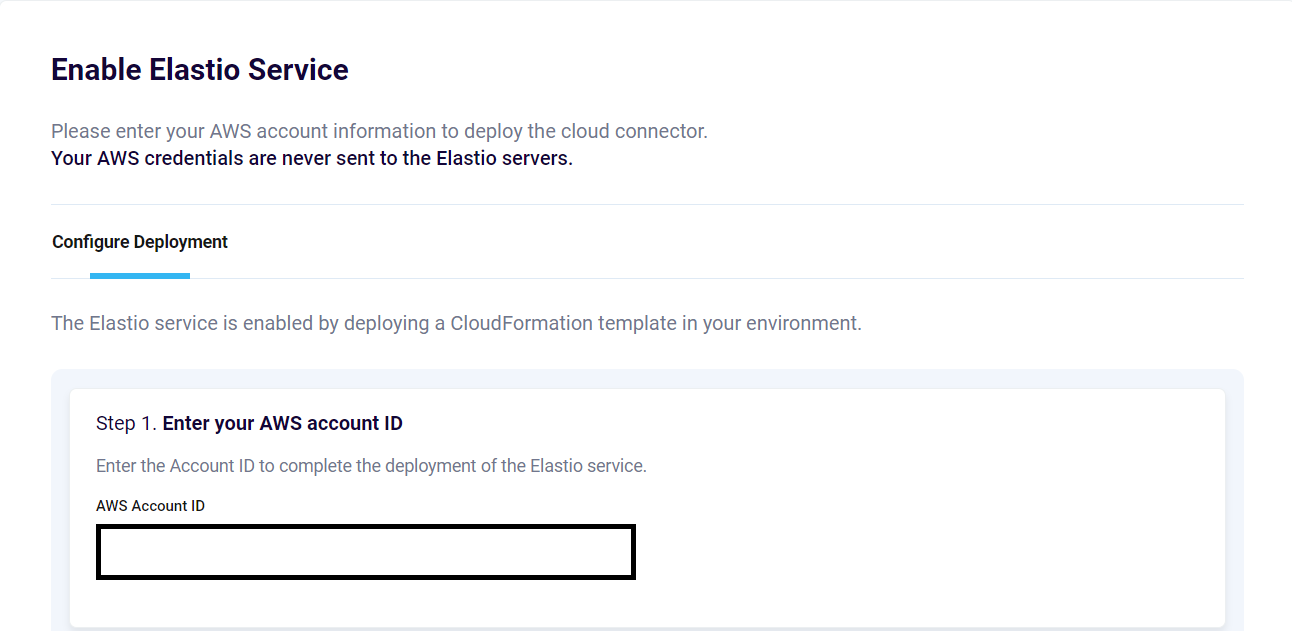
Figure 1: Enter your AWS account ID
- Select an AWS region to deploy the Elastio CloudFormation stack to. Click on the “Deploy CloudFormation Stack” link.
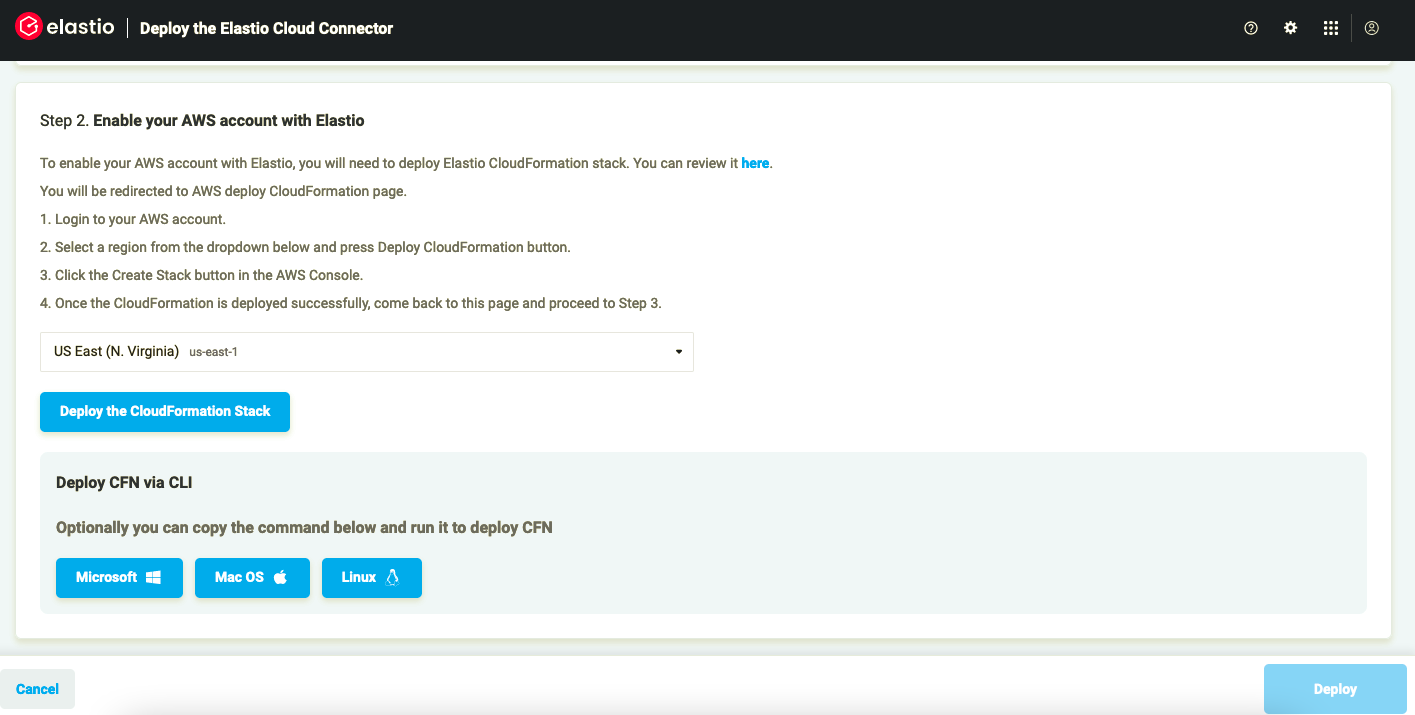
Figure 2: Deploy CloudFormation stack
-
An AWS Console window will open in a new tab.
-
On Step 2 you have an option to add custom prefix and/or suffix to the IAM roles and policies that the Elastio CloudFormation stack will deploy.
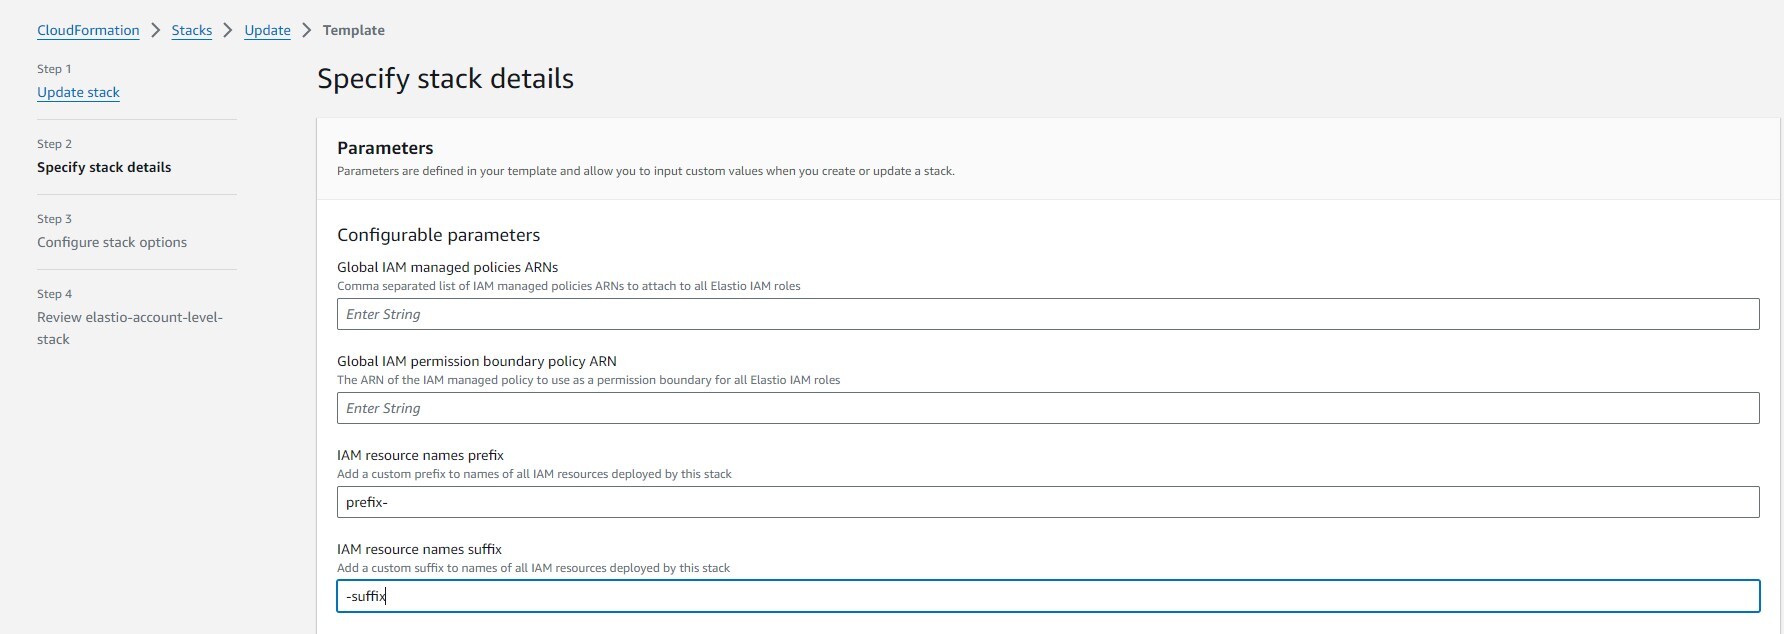
Figure 3.1: Add custom suffix and/or prefix
Please note the combined length of the suffix and prefix together should not exceed 14. In the case they do exceed the specified amount, CloudFormation deployment will fail with the following error:
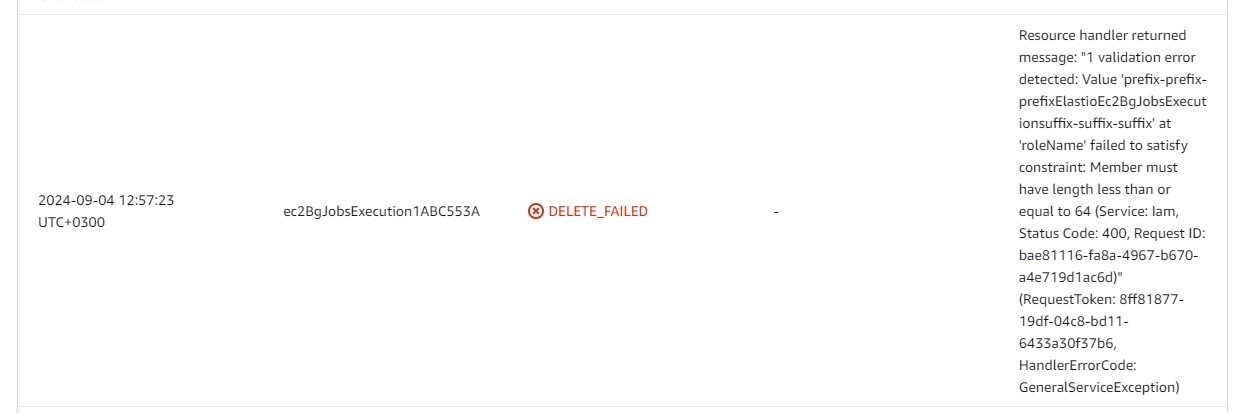
Figure 3.2: Prefix + suffix too long error
When the CloudFormation stack is deployed successfully, the IAM roles and policies that it created will have the specified prefix and/or suffix.
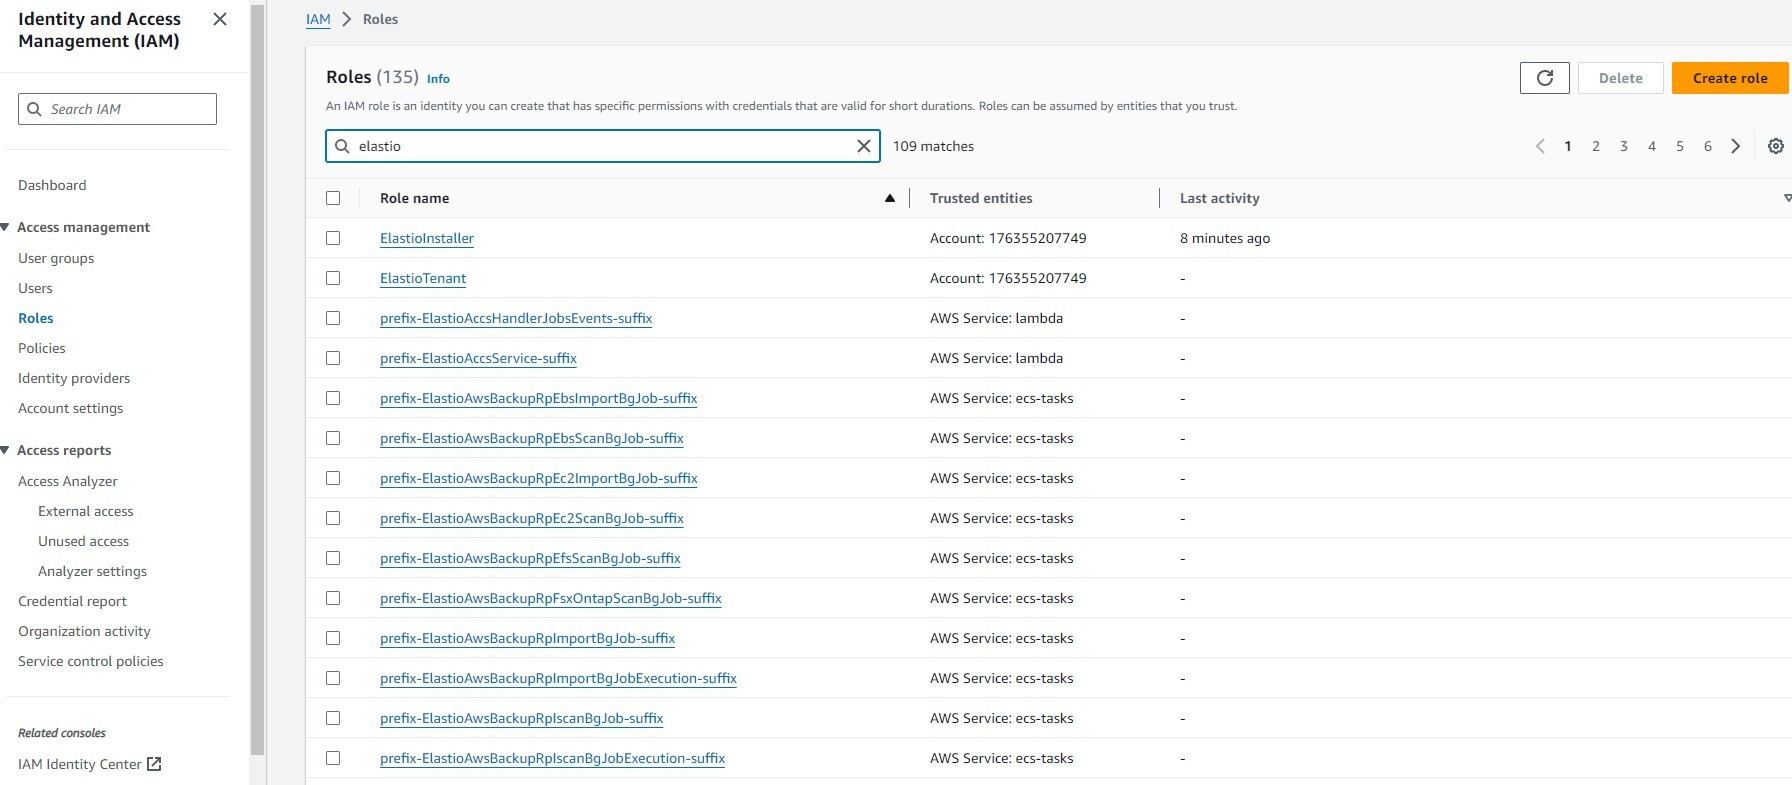
Figure 3.3: Resources with prefix and suffix
- Check the checkbox “I acknowledge that AWS CloudFormation might create IAM resources with custom names.”

Figure 4: Acknowledgement window
- Click the “Create Stack” button. Wait until the CloudFormation stack is deployed successfully. This might take a couple of minutes.
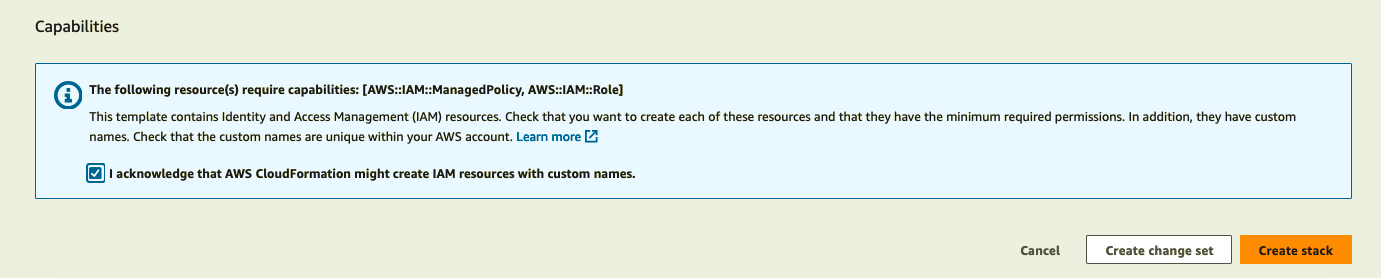
Figure 5: Create stack
Note: For further details on the Cloud Connector security information, click here.
- Once the stack creation is completed, go back to the Elastio Cloud Tenant. A list of available regions should appear in Step 3. Select the region(s) and the VPC(s) you want to deploy to. A default VPC is pre-selected, but you can change it if you wish.
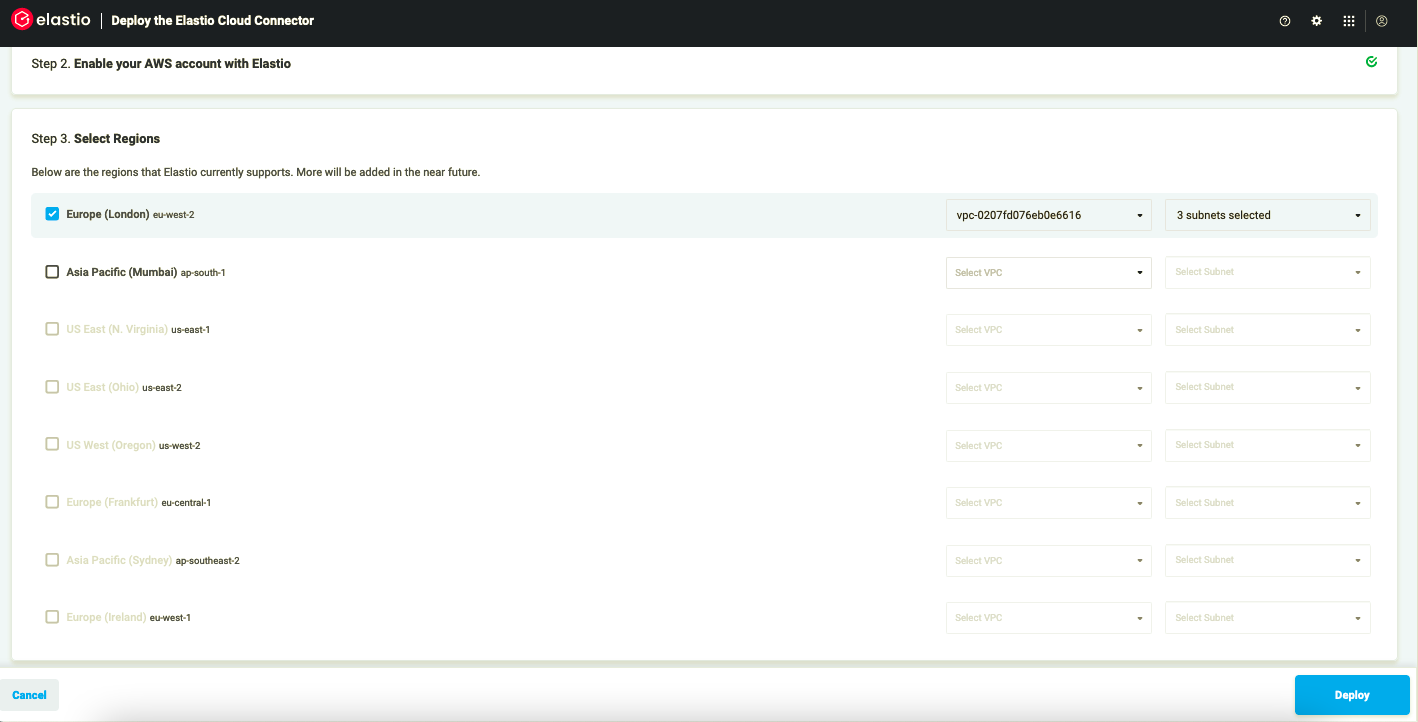
Figure 6: Select regions
Note: The VPC that you select to deploy to must have a subnet in every availability zone in the region. In addition, if you want to backup, restore resources from outside of AWS, or if you want to mount backups from outside of AWS, then those subnets should all be configured to assign public IPv4 addresses and be accessible from the public internet. If you plan to use Elastio only within the VPC, the subnet can be private, as well as the VPC itself.
- Click the “Deploy” button.
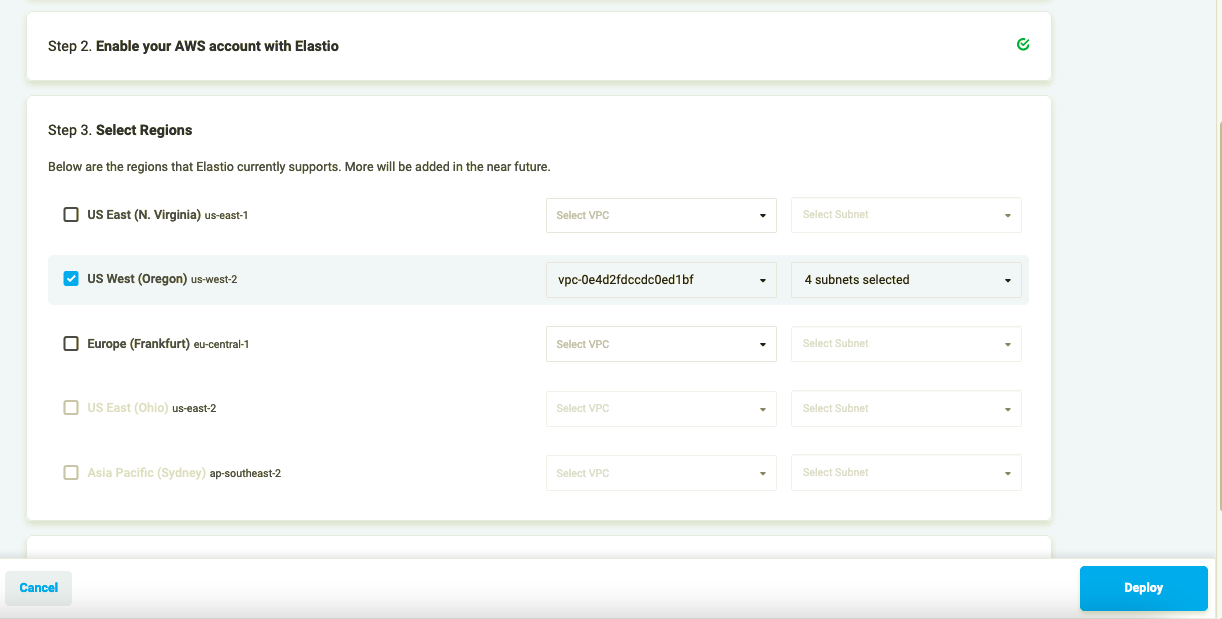
Figure 7: Deploy Elastio
- You will be forwarded to the Jobs page, where you can monitor the progress of your operations.
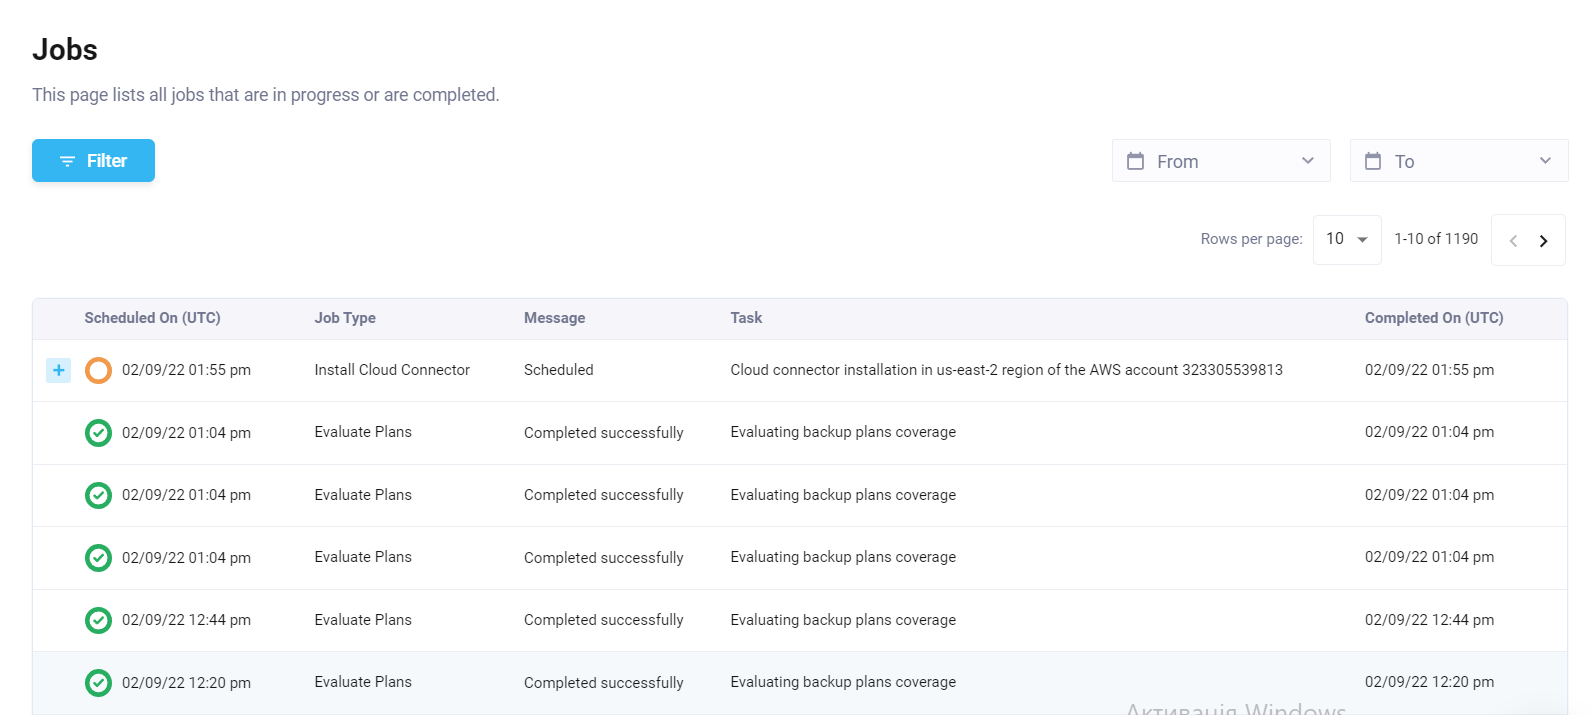
Figure 8: Jobs Page
Note: A default vault will be created for you when deploying the Cloud Connector to your account. You will be able to create additional vaults through the CLI or using your Tenant later.
Create a Policy
A Policy is a way of scheduling Elastio backups for certain assets in your AWS account enabled with Elastio. For now it is possible to create a Policy for AWS EC2 and AWS EBS.
To add a new Policy to your account, navigate to the Policies page and follow the steps below:
- Press the “+New Policy” button
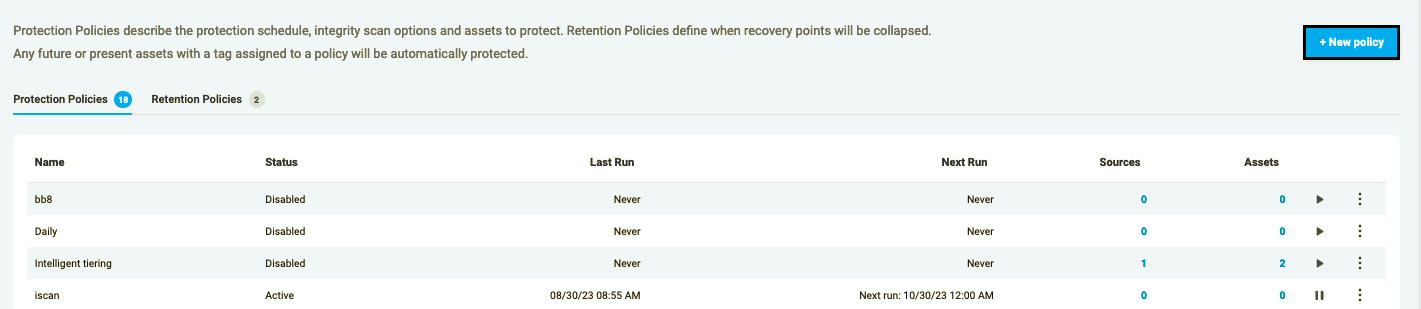
Figure 9: Add new Policy
- Add a name to your Policy and define the schedule for it.
Elastio backup Policy may run every 15 minutes, 30 minutes, every hour, 12 hours, as well as daily, weekly or monthly. It can be started immediately or at a set time.
Please note: if you have selected the “Run now” option, you should be aware that the first backup will run at its earliest availability, which for now is every 15 minutes. So, a Policy created at HH:25 with the “Run now” option on will run at HH:30 and then according to schedule.
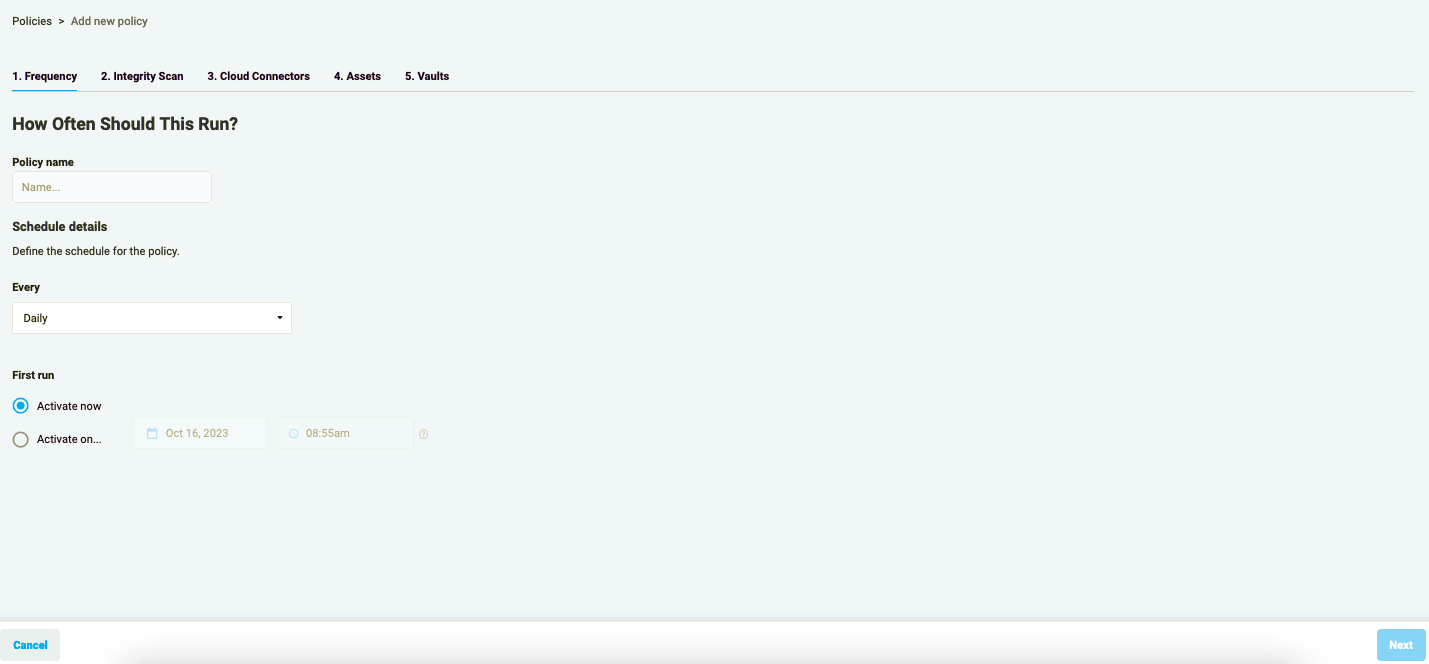
Figure 10: Add Policy schedule
- Integrity Scan - provides you an option of running Ransomware or Malware detection scan against the recovery points that are created when the Policy is executed. You can select either one or both options.
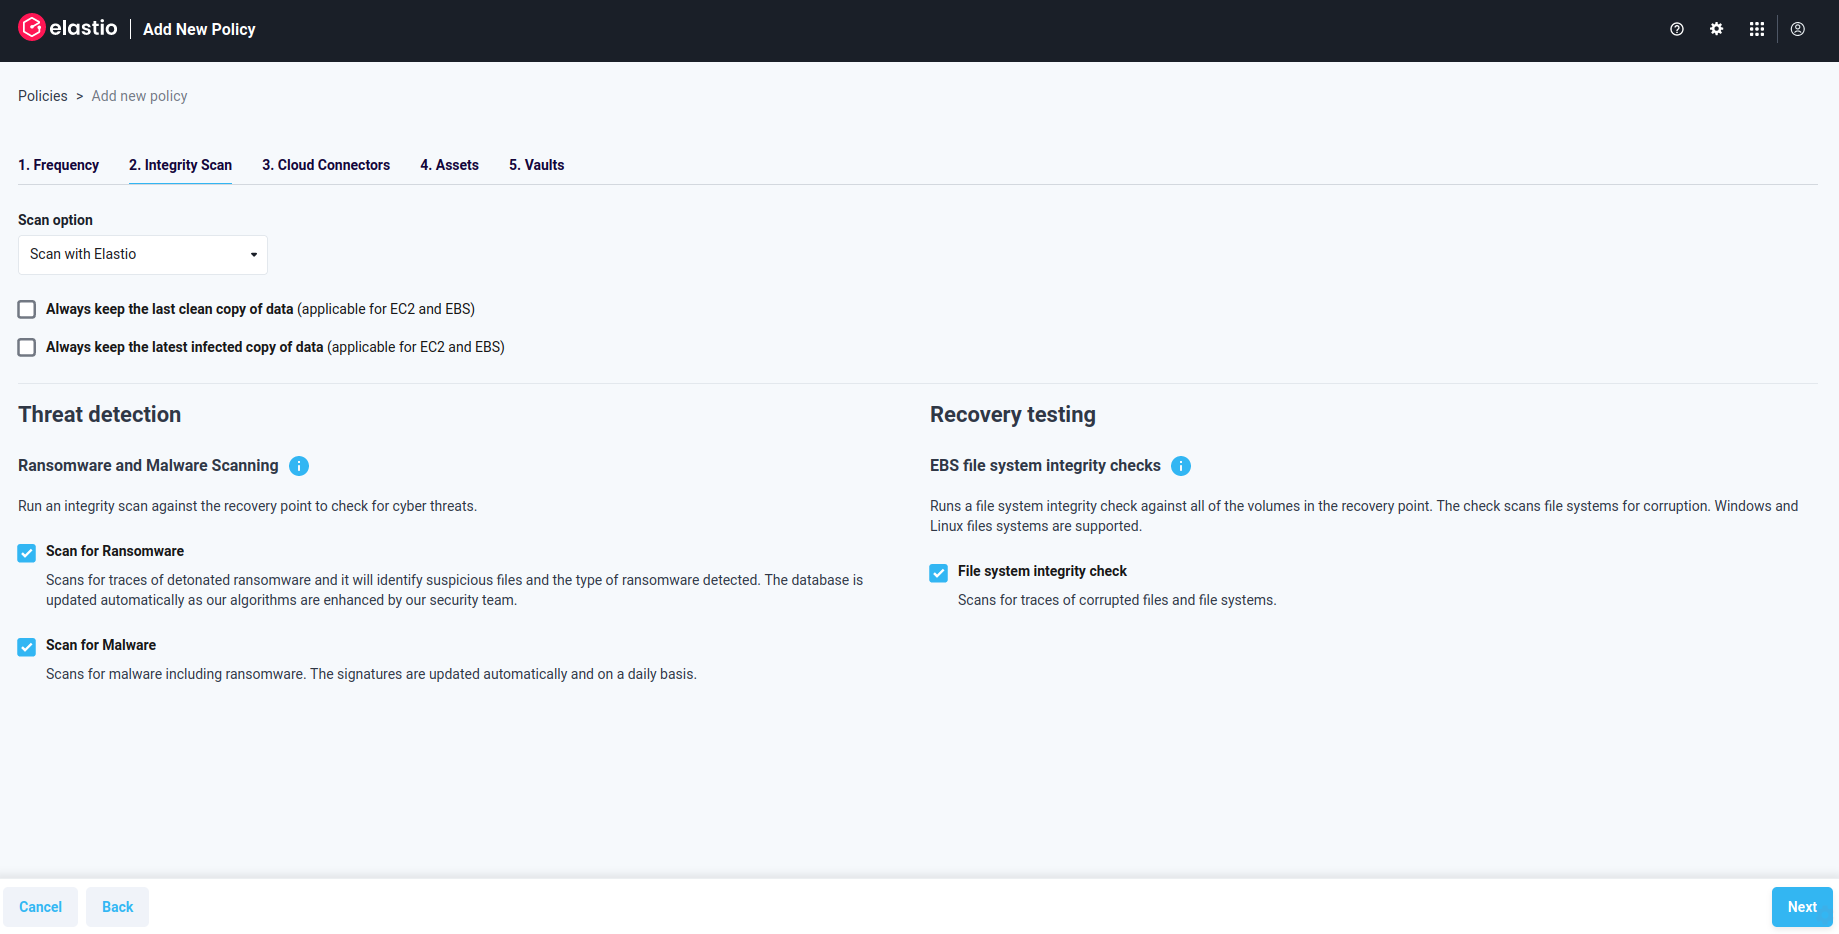
Figure 11: Add new Policy - Integrity Scan
- Select assets you want to include in the Policy on step 3. You can filter available assets by Account ID, Asset Kind, Instance ID, Instance Type, Region, Volume Type, VPC ID, RP Status, Volume ID, and Asset Tag. Alternatively, you can create a Policy for all assets that have a certain tag.
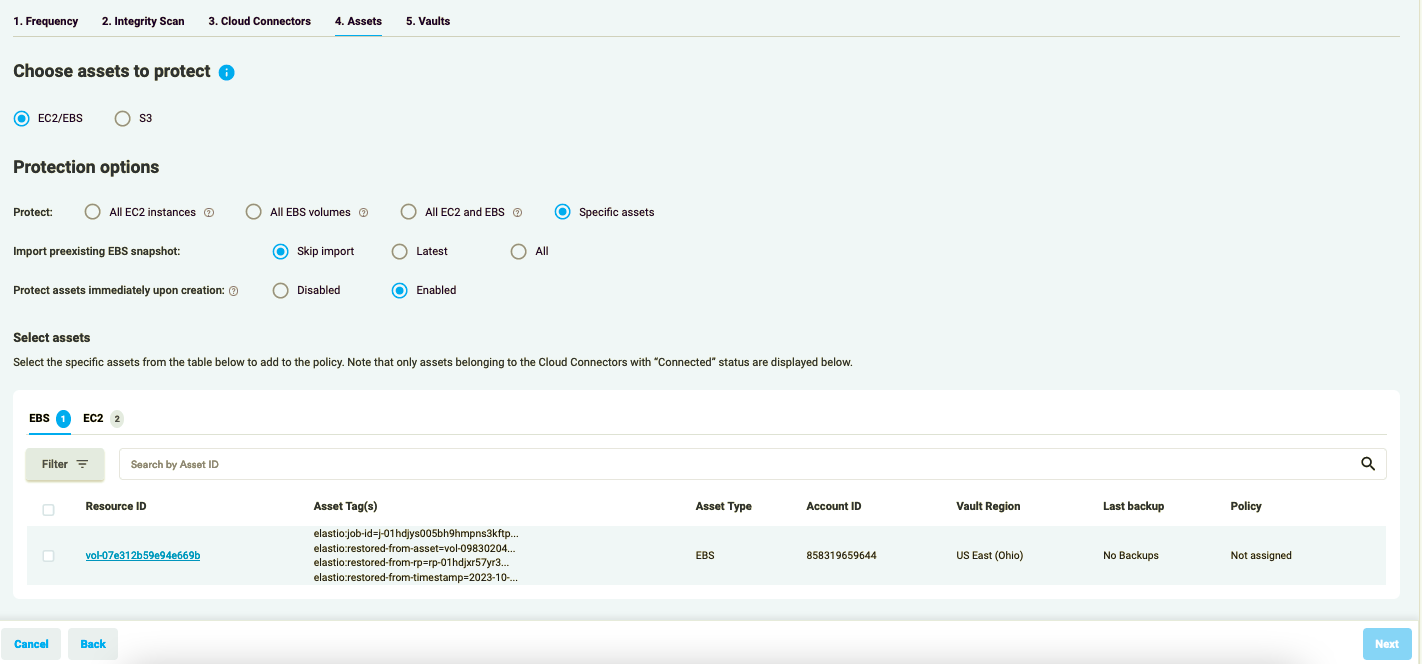
Figure 12: Add new Policy - Assets
- Press the “Save and Activate” button to start your Policy.
Please note: Asset count in the Policies table on the Policies page will be 0 until the first run of the Policy. Once it was run, the assets count will be updated with appropriate number.
Monitor Backup Progress
The Elastio Tenant Jobs page allows you to check the status of a certain operation performed by the Elastio service. The Jobs table displays a Job Type, its Task, the Date the operation was scheduled on, the Date of its completion and the Status of the Job.
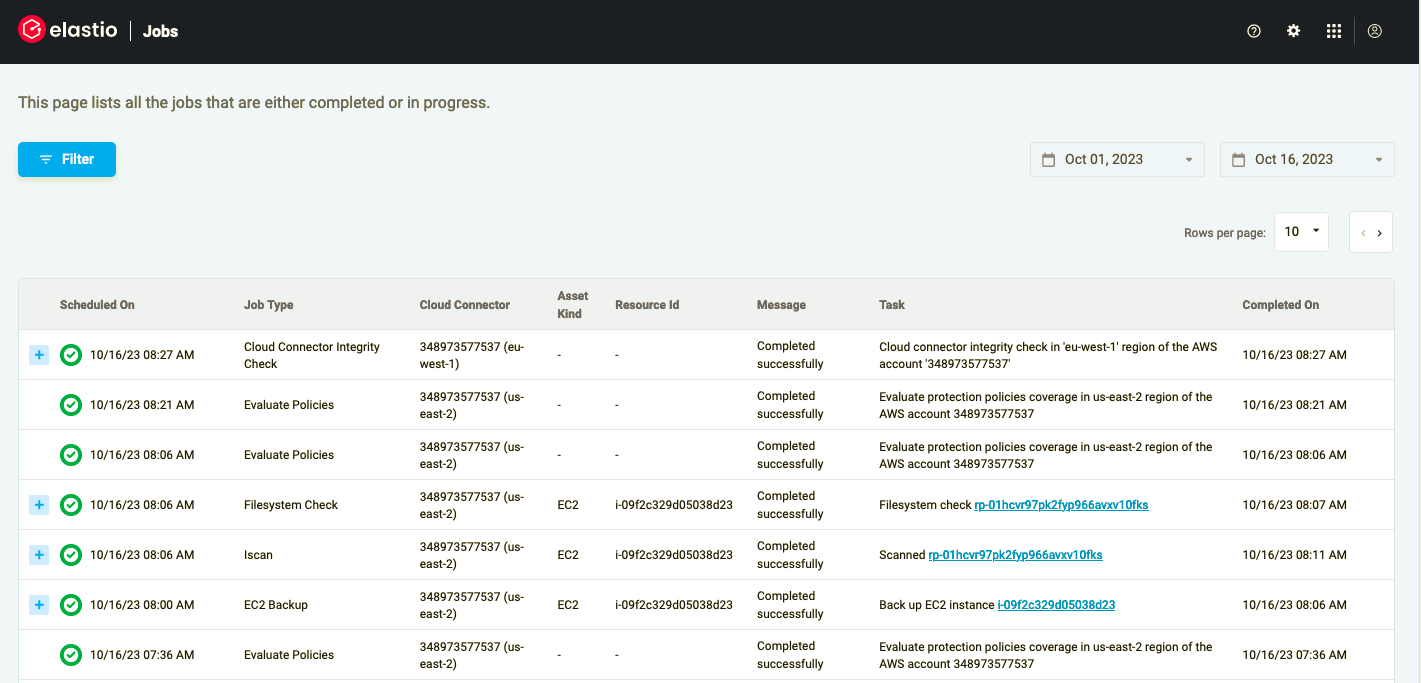
Figure 13: The Jobs table
The task of the job carries the description of the operation performed by Elastio.
The “scheduled on” date displays the date the operation was scheduled on. The “completed on” date displays the date when the operation was completed.
The status of the job shows the progress of the operation.
In order to find a job of a particular type, apply filter/s provided by the service.
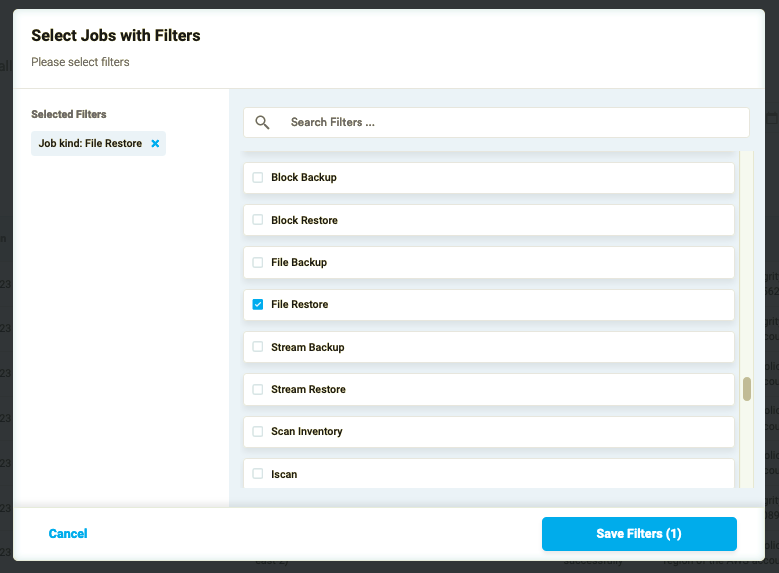
Figure 14: The Jobs filters
Clicking on the job type will show the detailed progress of the parent job, as well as the status of the child jobs included in the operation.

Figure 15: The Jobs progress
Audit Recovery Points
Clicking on the EC2 instance alias from the Jobs table will trigger the detailed information about the recovery point.
If the recovery point is healthy, the information will look like this:
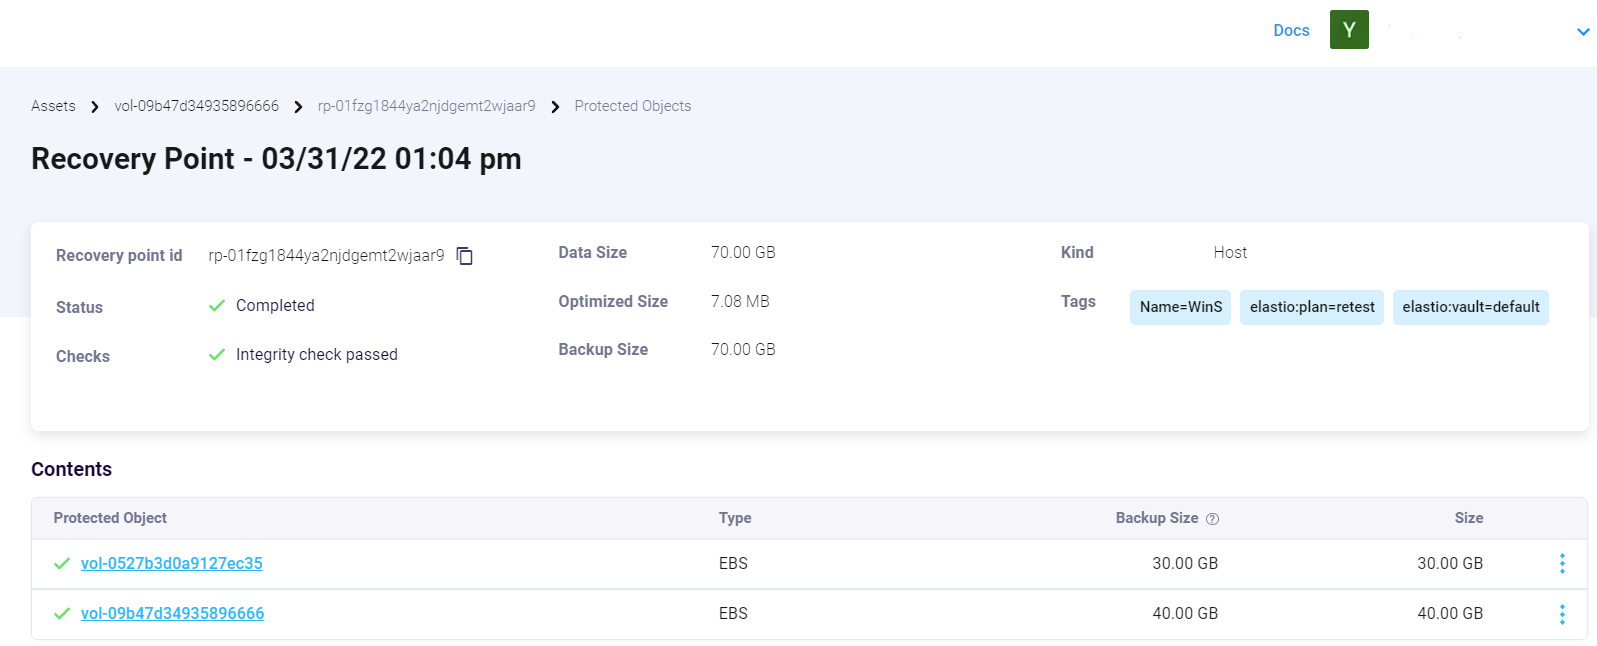
Figure 16: A healthy RP
In case when a recovery point is unhealthy, the results will be displayed as follows:
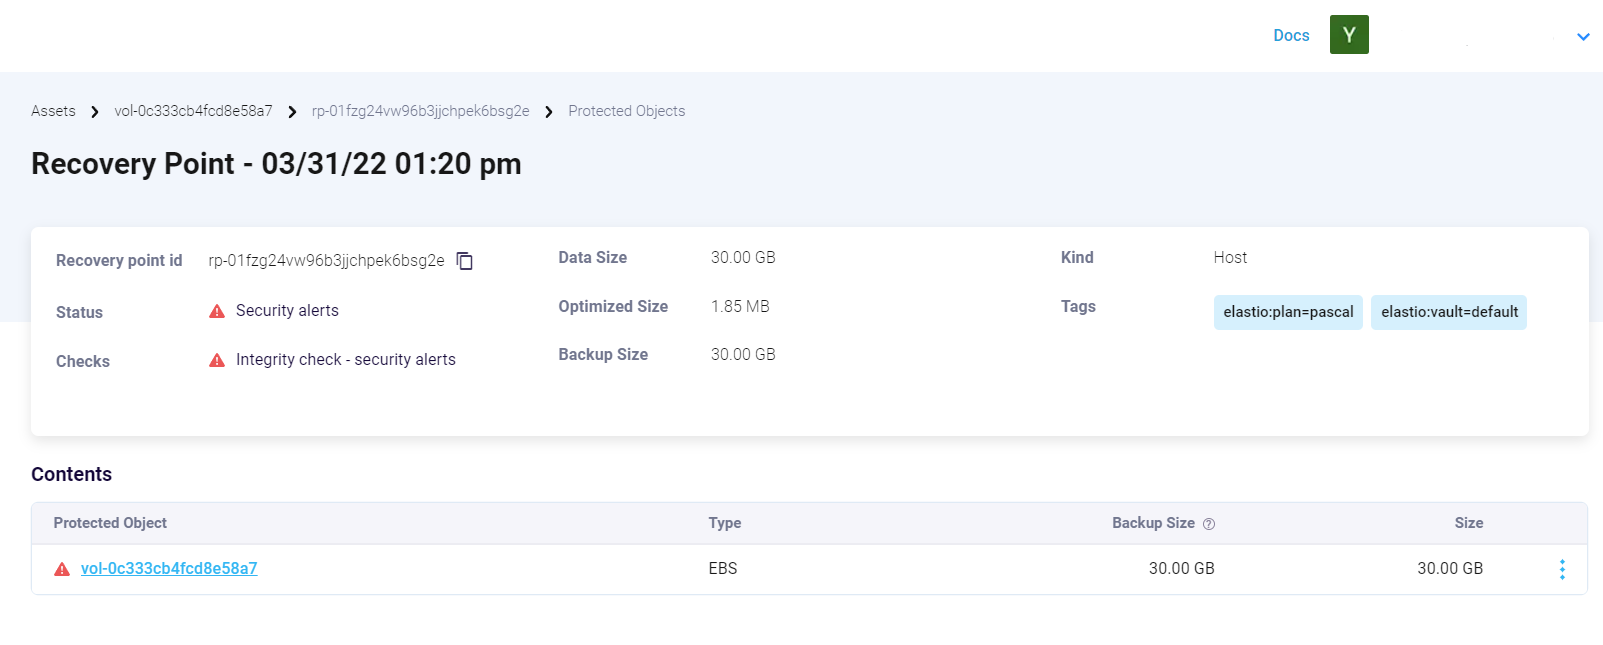
Figure 17: An unhealthy RP
Restore a Recovery Point
Clicking on the three-dots button on the right of the asset name will allow you to restore the recovery point.
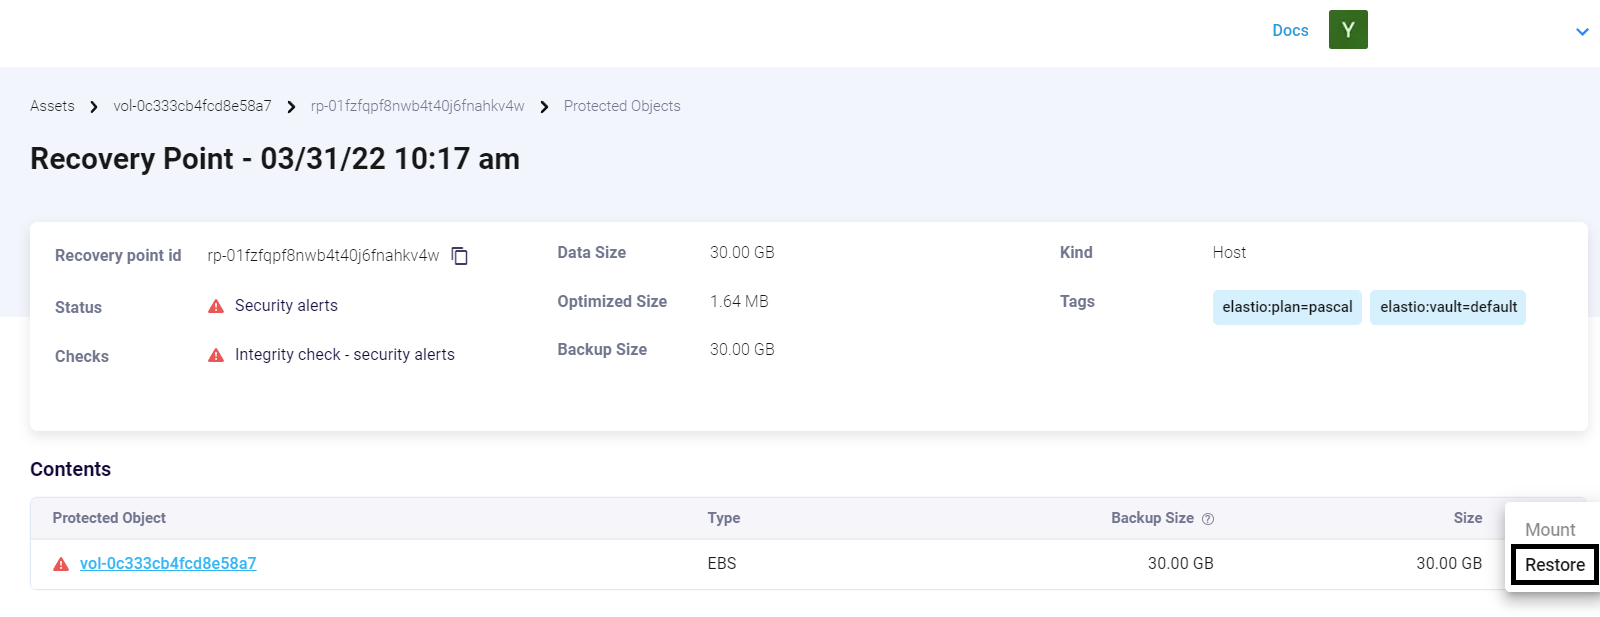
Figure 18: Restore RP
Please, note: When restoring an EC2 or EBS recovery point Elastio will create a new instance or volume respectively in your AWS account with identical properties to the original.
Explore reports
If you are interested in the detailed report on a certain recovery point, you can locate it on the Elastio Tenant Reports page.
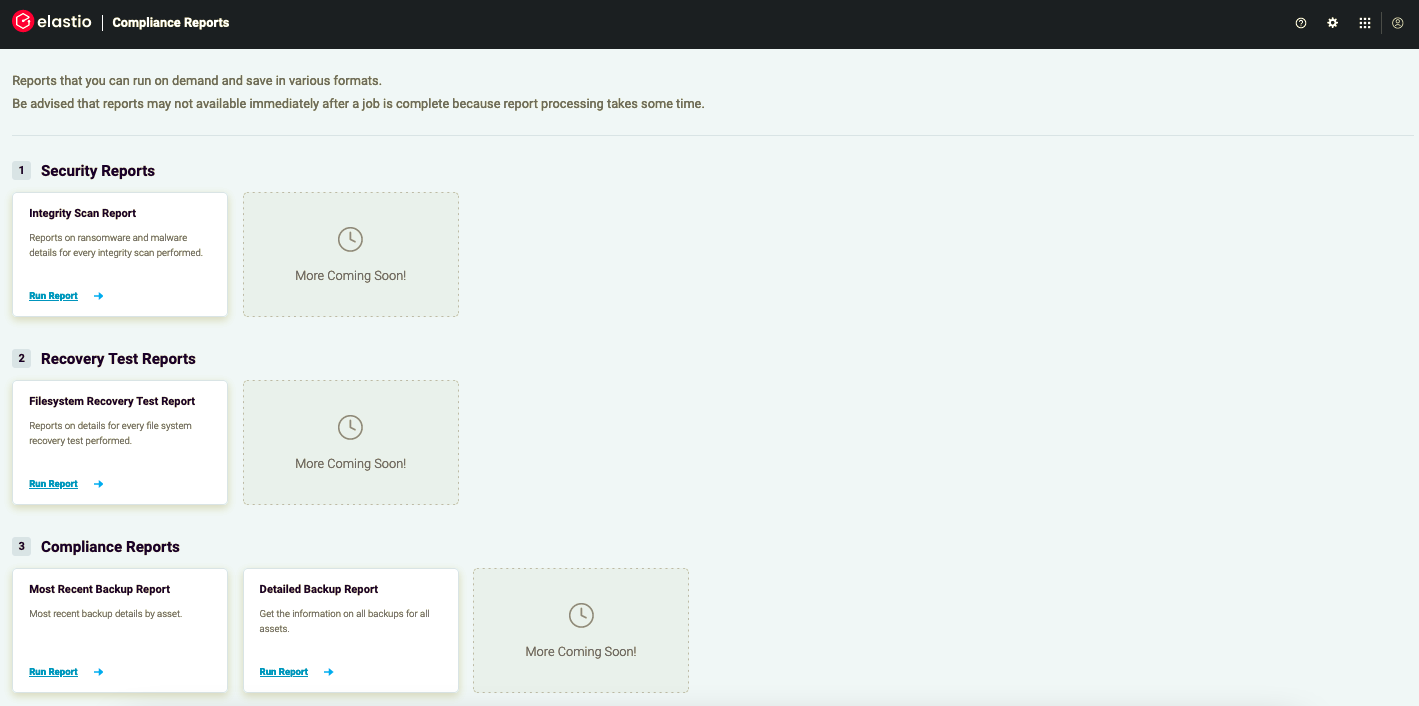
Figure 19: Reports Page layout
To run a report, click on the Run Report button.
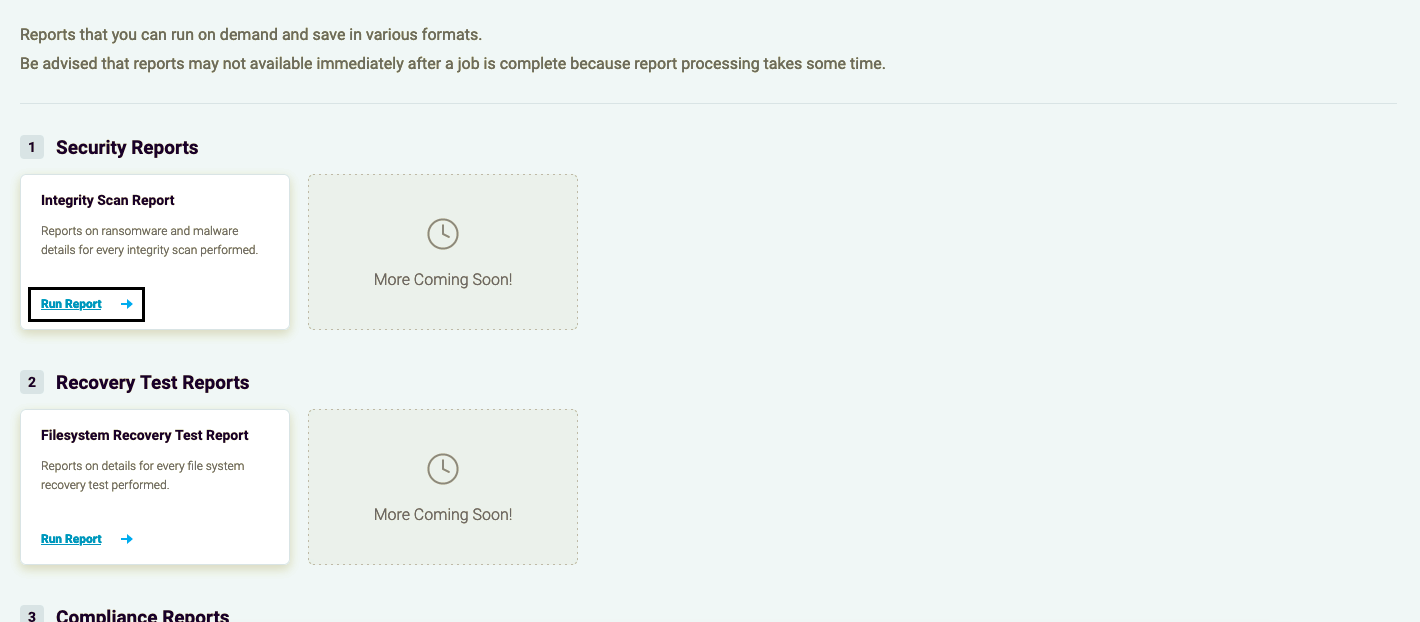
Figure 20: Run Report button
On the newly opened page you will see a table which provides a list of recovery points. The table displays the date when the Integrity Scan was run against the recovery point, the Account ID and the Regions where Cloud Connector has been deployed.
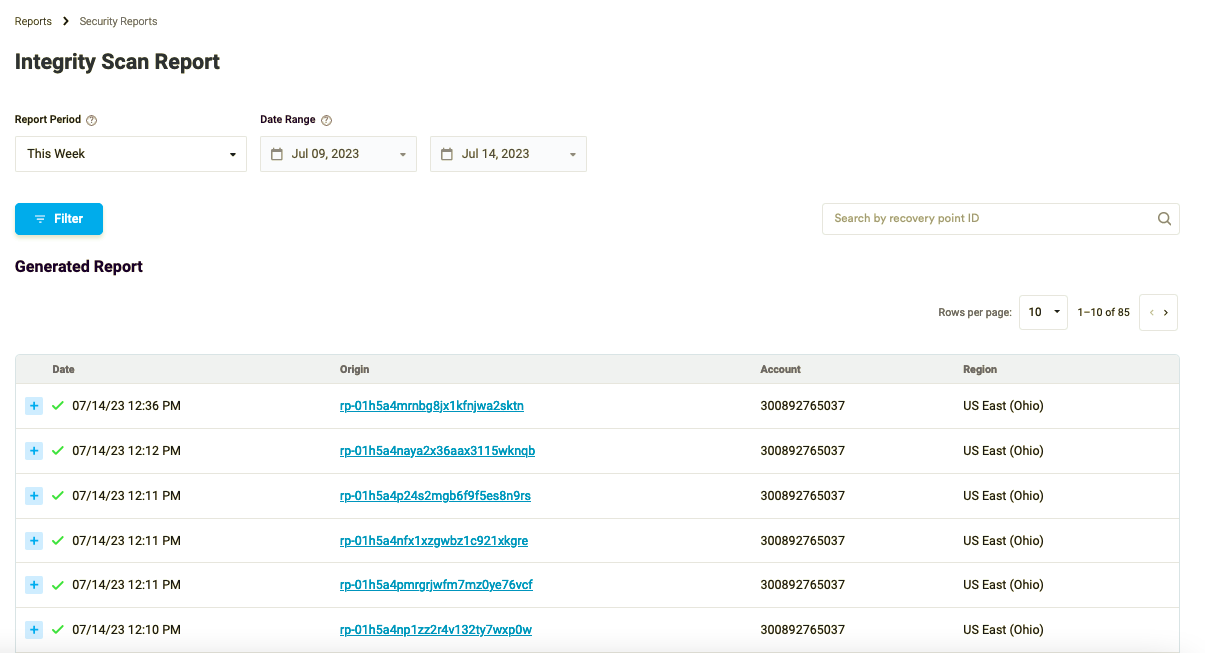
Figure 21: The Recovery Points table
Clicking on the recovery point will show all the backed up assets.
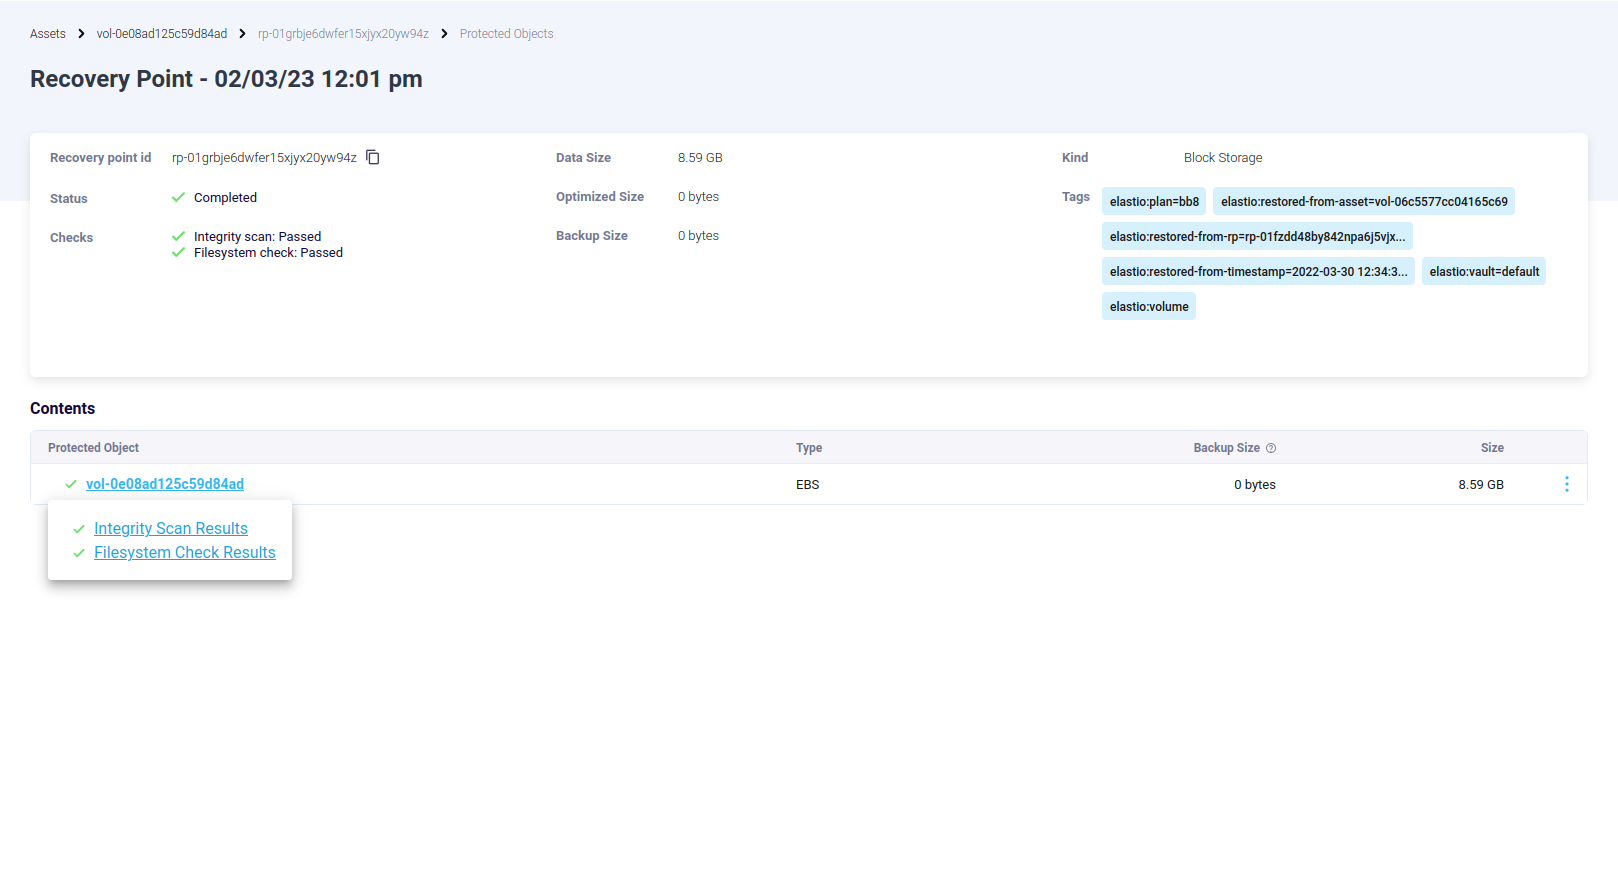
Figure 22: Recovery Point Assets
Clicking on the asset will display the Integrity Malware and Ransomware Scan Results.
Figure 23: Scan Results
Alternatively, you can access the ransomware and malware check results for every recovery point checked on the per asset basis. To do so, go to Assets page.
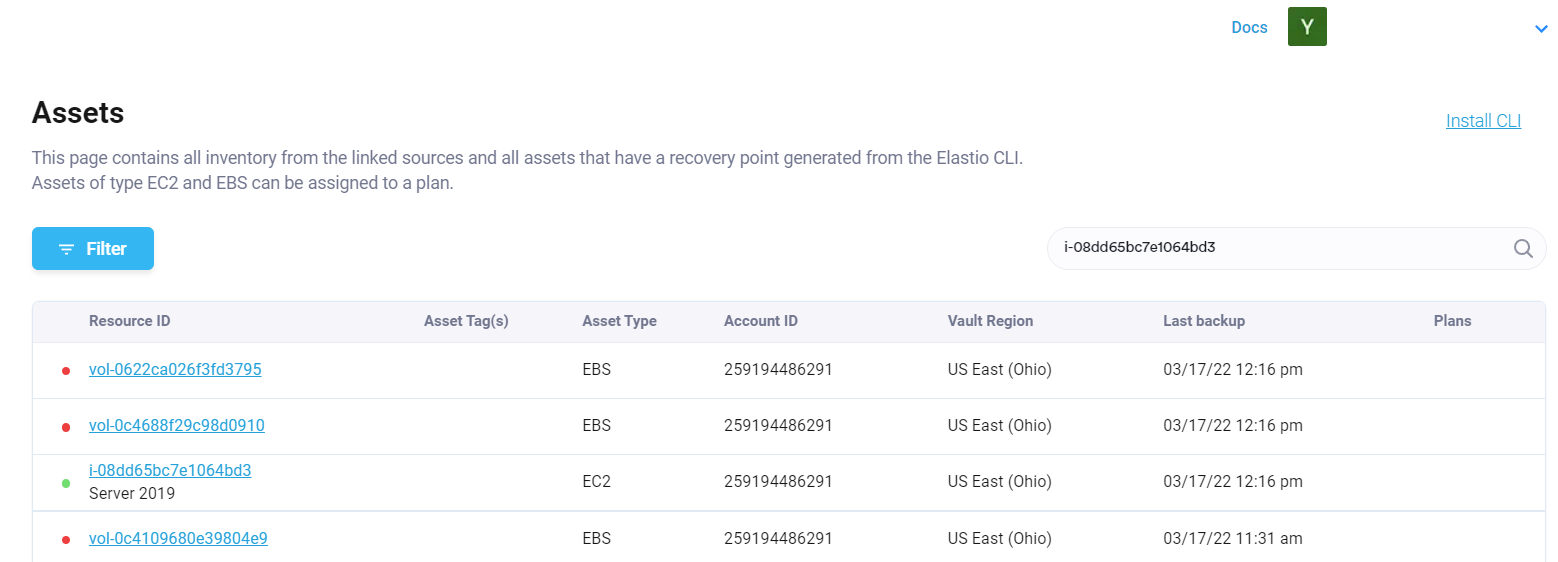
Figure 24: Assets Page layout
Clicking on the asset will display the list of the recovery points with their respective integrity scan status to the left. If the icon is gray the check was not performed, green icon means that no malware or ransomware was identified, and if the icon is red - a vulnerability was found.
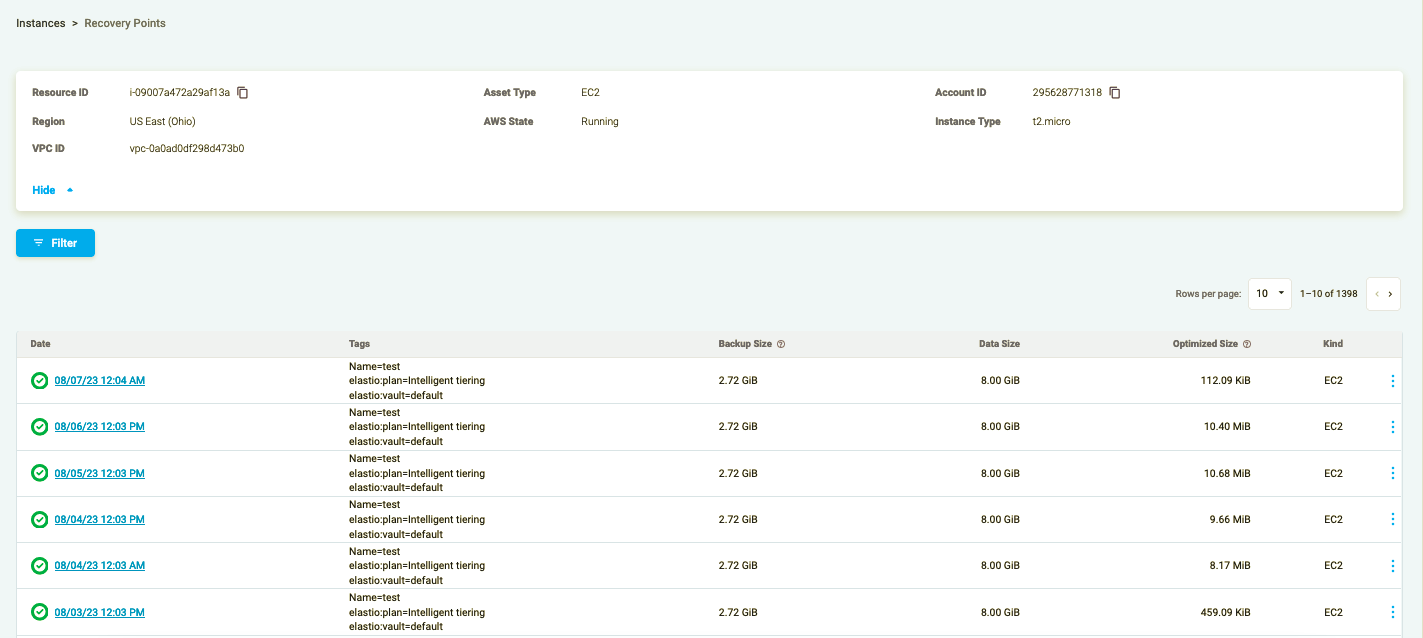
Figure 25: Assets Scan results