EFS Backup with Elastio
Prerequisites:
- Elastio is installed and configured,
- EFS file system is available,
- Security group to access EFS is configured.
- IAM role with
ElastioLocalBackuppolicy is created
To create an IAM role, follow the steps below:
- Navigate to the Identity and Access Management (IAM) console of your AWS account and press the Create role button,
- Select AWS service for Trusted entity type and EC2 for Common use cases,
- Attach
ElastioLocalBackuppolicy to your role and press Next, - Add a name to your role, review the details and create the role.
Setup:
- Go to Task definition in us-east-2.console.aws.amazon.com/ecs and create new task definition:
- Fill in all required fields:
- Select FARGATE in Select launch type compatibility and press Next,
- Name the task definition and assign the IAM role with
ElastioLocalBackuppolicy, - Select the role you created in Task role field,
- Select existing or create new Task execution role,
- Select 9GB for Task memory (GB),
- Select 2 vCPU for Task CPU (vCPU),
- Add EFS file system in Volumes,

Figure 1: Add EFS in Volumes
- Press Add container button,
- Name the container,
- Put
public.ecr.aws/elastio-dev/elastio-cli:latestin Image field, - In STORAGE AND LOGGING section specify ‘/mnt/efs’ Mount point for EFS file system added previously.
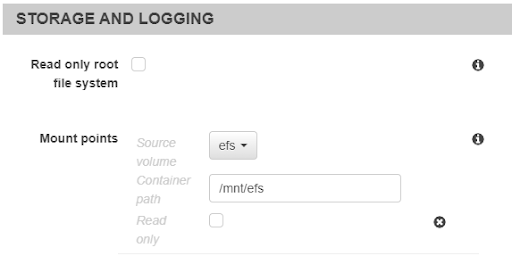
Figure 2: Storage and Logging
- In ENVIRONMENT section fill in ‘sh,-c’ in Entry point,
- Specify next command to iscan and backup EFS by
elastio:elastio file backup /mnt/efs --hostname-override EFS_backup_via_ECS --iscan
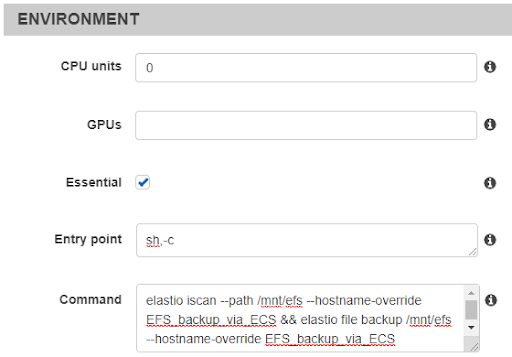
Figure 3: Environment
- Press Add
- Specify next command to iscan and backup EFS by
- Fill in all required fields:
- Go to Tasks in ESC cluster and Run new Task:
- Select Task Definition created in step 1,
- Select Cluster VPC, Subnets, Security groups that has access to EFS file system,
- Press Run Task.
Similarly you can create scheduled task to run on a regular basis.
Progress of the iscan and the backup is available in the Elastio Tenant:
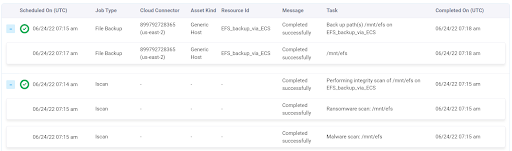
Figure 4: The progress table
Results of the iscan are available in the Reports section in the Elastio Tenant:
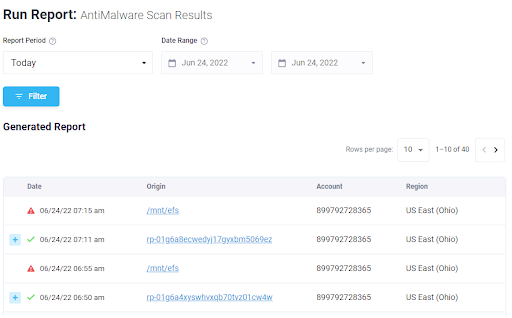
Figure 5: The reports section
Recovery points are available in the Assets section of the Elastio Tenant under the name you specified for --hostname-override option:
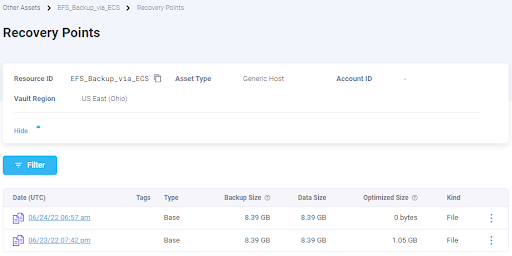
Figure 6: The Assets section
To restore press : on the recovery point and select Restore, next follow the instructions in the popup:
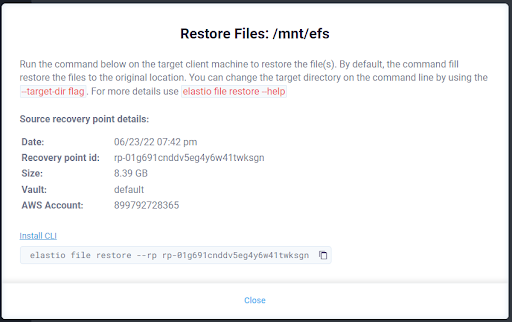
Figure 7: Restore Files