Storage
Table of Contents
With the Elastio Tenant Storage Management page, you have the ability to create and modify vaults in any AWS account or region where the Cloud Connector is deployed. Additionally, you can designate a default vault to streamline your backups. Elastio ScaleZ vault consists of several components: provisioner service, data service and cyber resilience service. The vault functions within your AWS account in a designated region. When Elastio operations need to run a spot worker instance is launched, then it is terminated when the job is completed. The spot instances run within the subnets selected when deploying Elastio. The more subnets are available to Elastio, the more instance spot capacity is available for the operations to run on. It is recommended to select several subnets within several availability zones when available for best performance.
Create a new vault
To create a vault, firstly navigate to the Sources page. A list of the enabled Sources (AWS accounts) will be displayed.
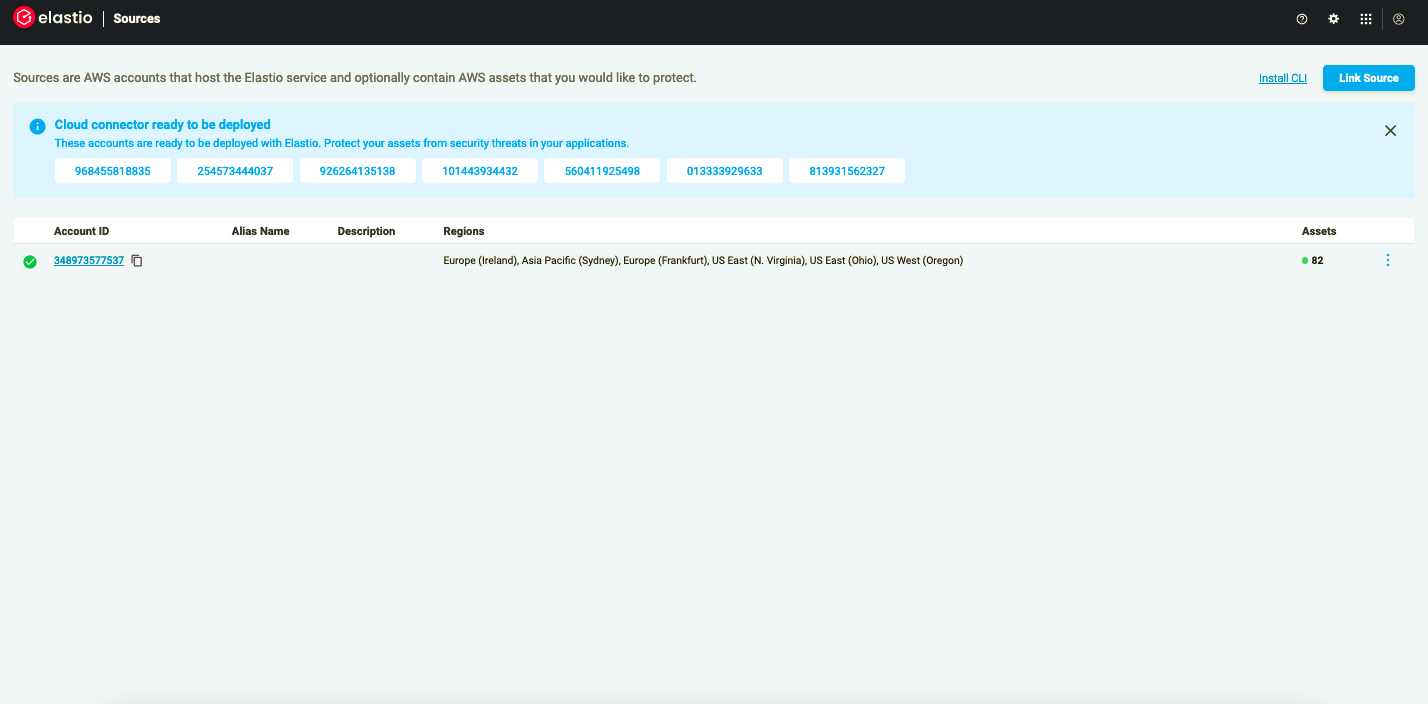
Figure 1.1: Elastio Tenant Sources page
Select a connected Source to create a new vault in. Once you press the account ID, a new page will open where a list of available regions (AWS regions with Cloud Connector installed) can be found.
In the pop-up window that opens select a region, a VPC and subnets within the region, and enter a name for the new vault.
Note: Only AWS regions within the selected Source with Cloud Connector installed will show up in the drop-down.
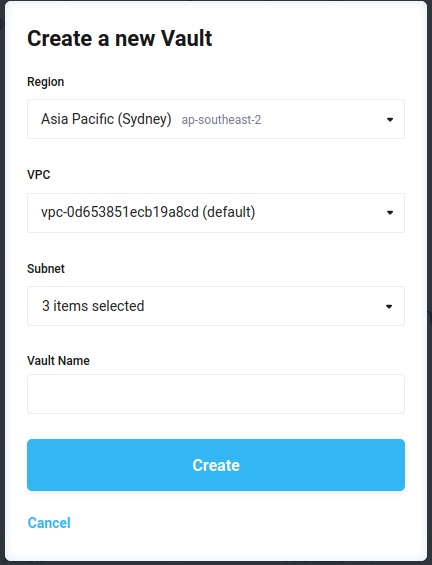
Figure 1.2: Vault Creation pop-up
Press the “Create” button. You should see the pop-up notification in the bottom right corner of the page communicating the progress.
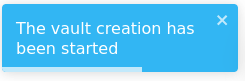
Figure 1.3: Vault Creation progress
The progress can be tracked on the Jobs page of your Elastio Tenant.
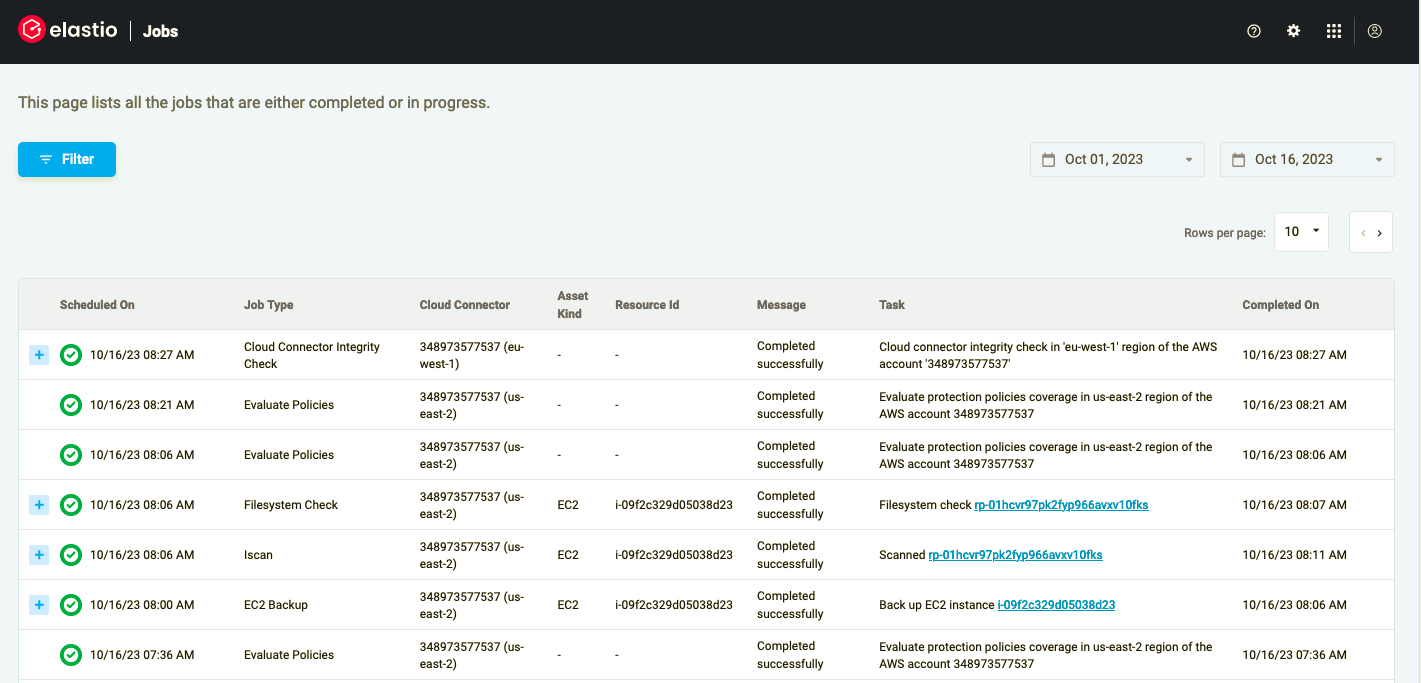
Figure 1.4: Vault Creation Job list
Once the vault is created, the Job Status will be “Completed Successfully” and a green pop-up notification will be displayed in the bottom right of the page.
Note: The limit of 4 vaults arises due to the fact that AWS Batch queues are used to perform automated tasks related to backup, integrity scans, restores, etc. Multiple queues are needed per vault, and each vault must have its own queues because Elastio needs to support placing each vault in a separate VPC. Since the maximum number of AWS Batch queues in a region is 50, this is the origin of the 4 vault limit. This limit can be increased by opening a support case with AWS.
Edit a vault
To edit a vault, navigate to the Sources page. Select the account, the vault you would like to edit and press the “Details” button.
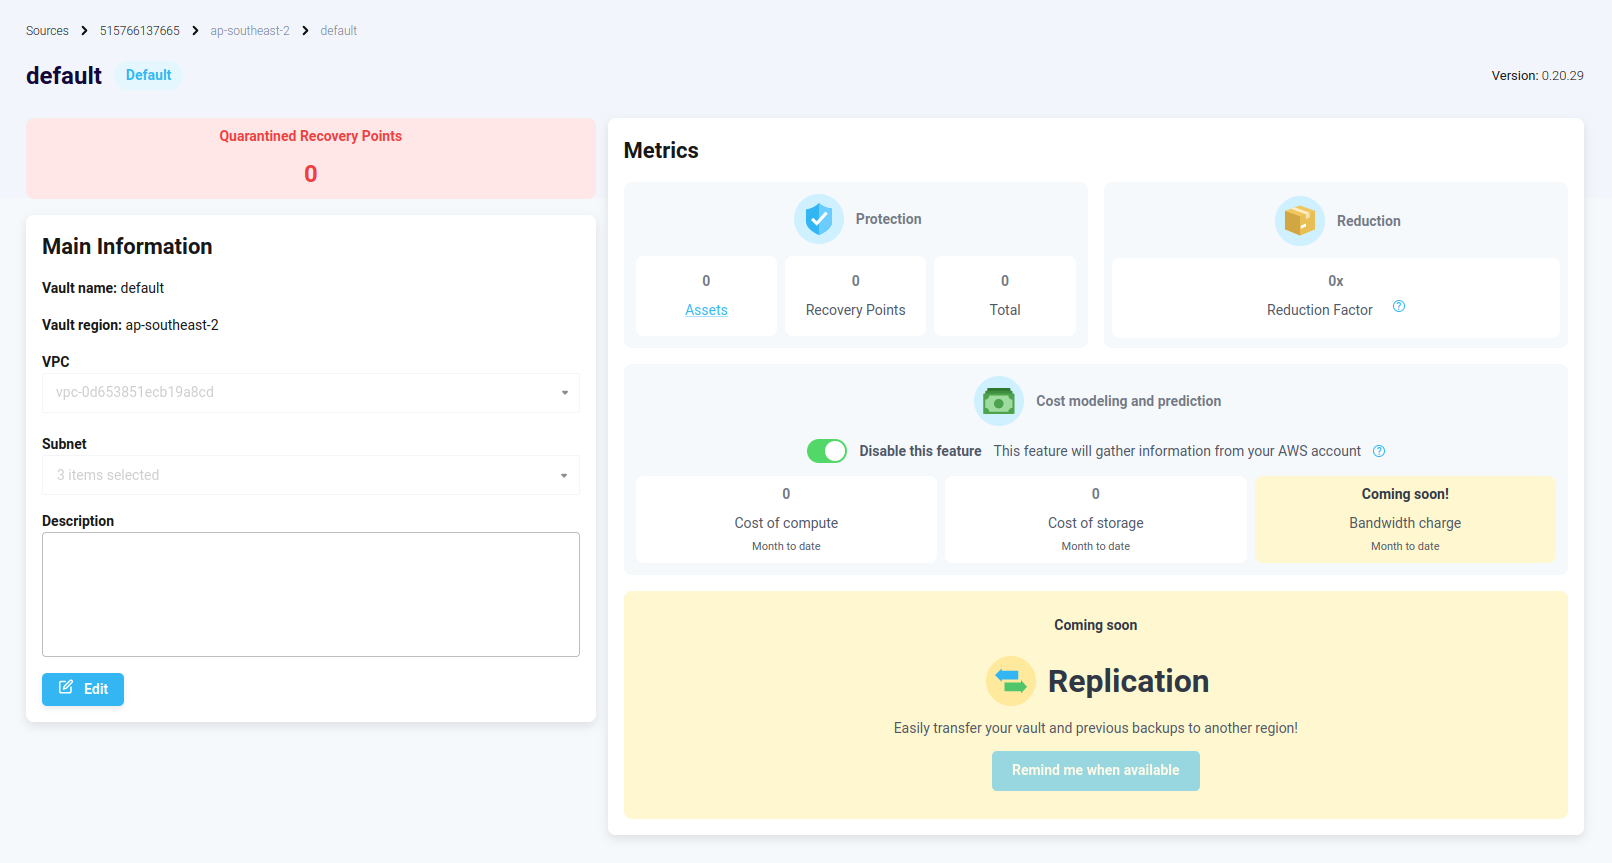
Figure 2.1: Edit a vault
A new page will open after clicking on the “Details” button. To modify the existing information about the vault and press the “Edit” button and after all changes are dome - press “Save”.
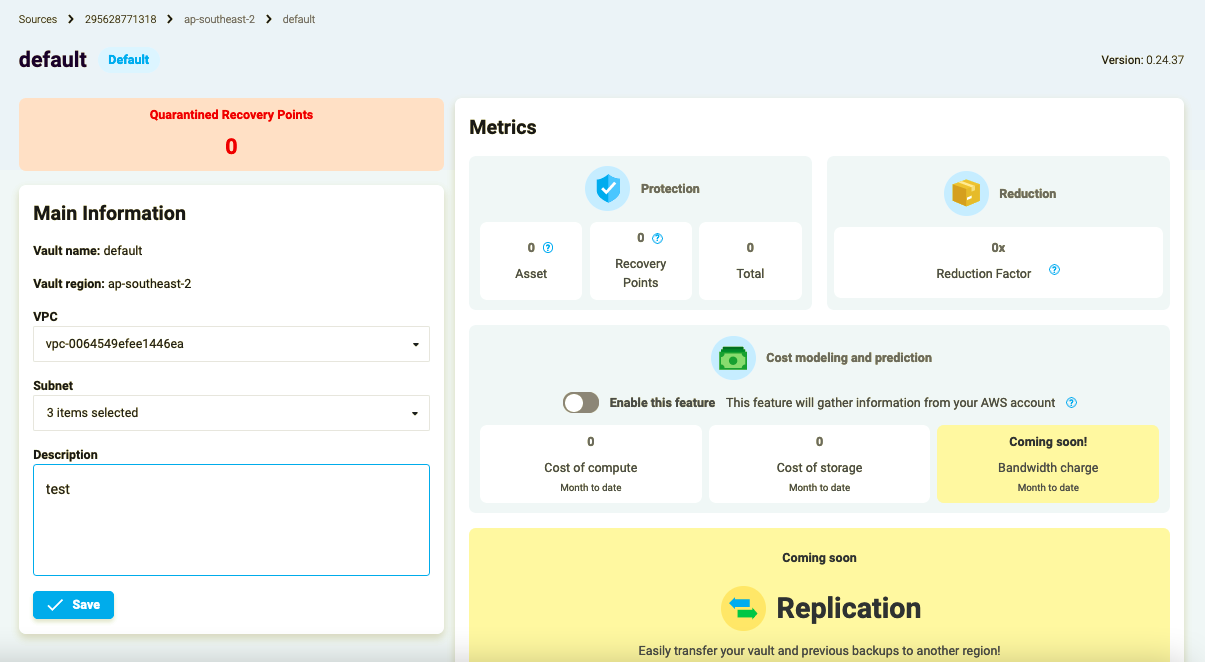
Figure 2.2: Select a vault
The newly opened page displays the number of quarantined recovery points.
Set a vault as default
Setting a vault default will ensure that there is no additional input needed when working with Elastio assets. The default vault is used when running backups, restores and mounts. Elastio creates a vault named “default” and sets it default when a Cloud Connector is deployed.
Additionally, you can create your own vault (or several - there is a hard limit of 7 vaults per region due to AWS resources limitation). Any vault can be set default and used as such.
To set a vault as default, press “ Make Default” next to the selected vault.
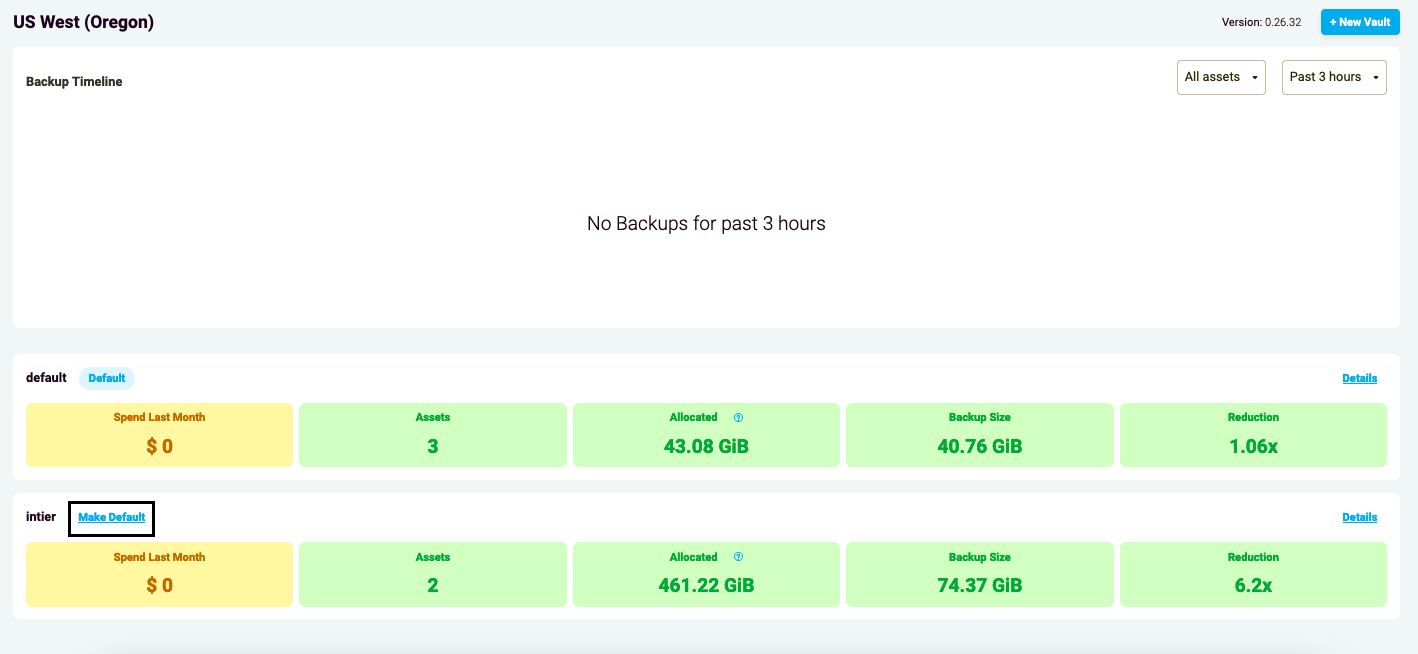
Figure 3.1: Set Vault as Default
A confirmation pop-up will appear on the screen. Press the “Yes” button.
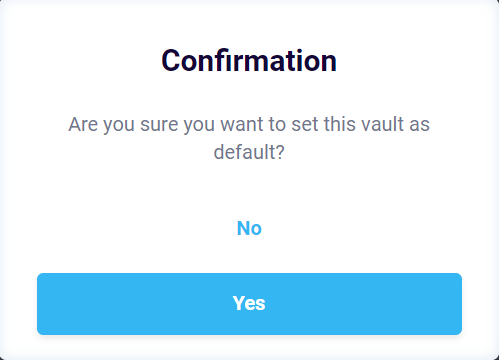
Figure 3.2: Confirmation pop-up
Once the vault is set as default, a notification will be shown in the bottom right corner of the screen.

Figure 3.3: Set as Default Success
Delete a vault
Vault deletion can be only performed from the Elastio CLI for now. The UI functionality is coming soon.